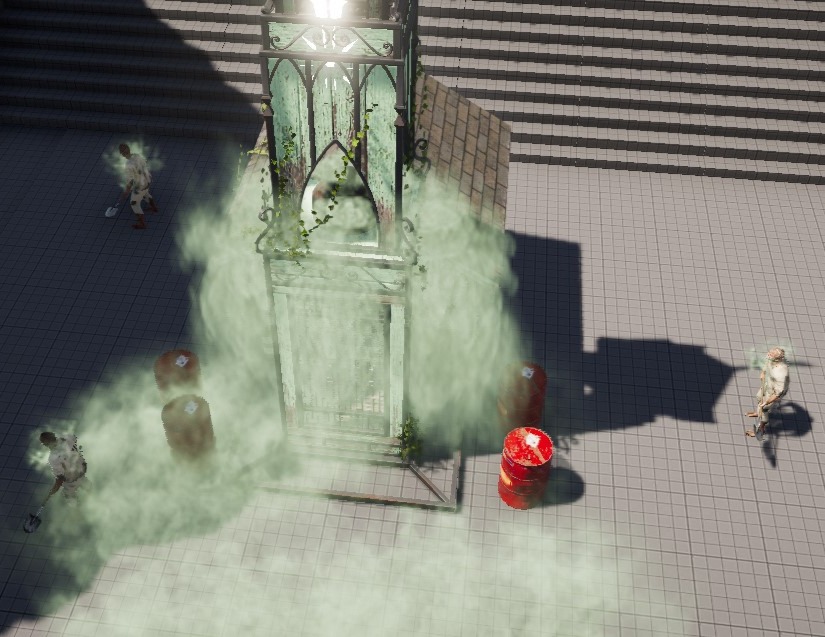
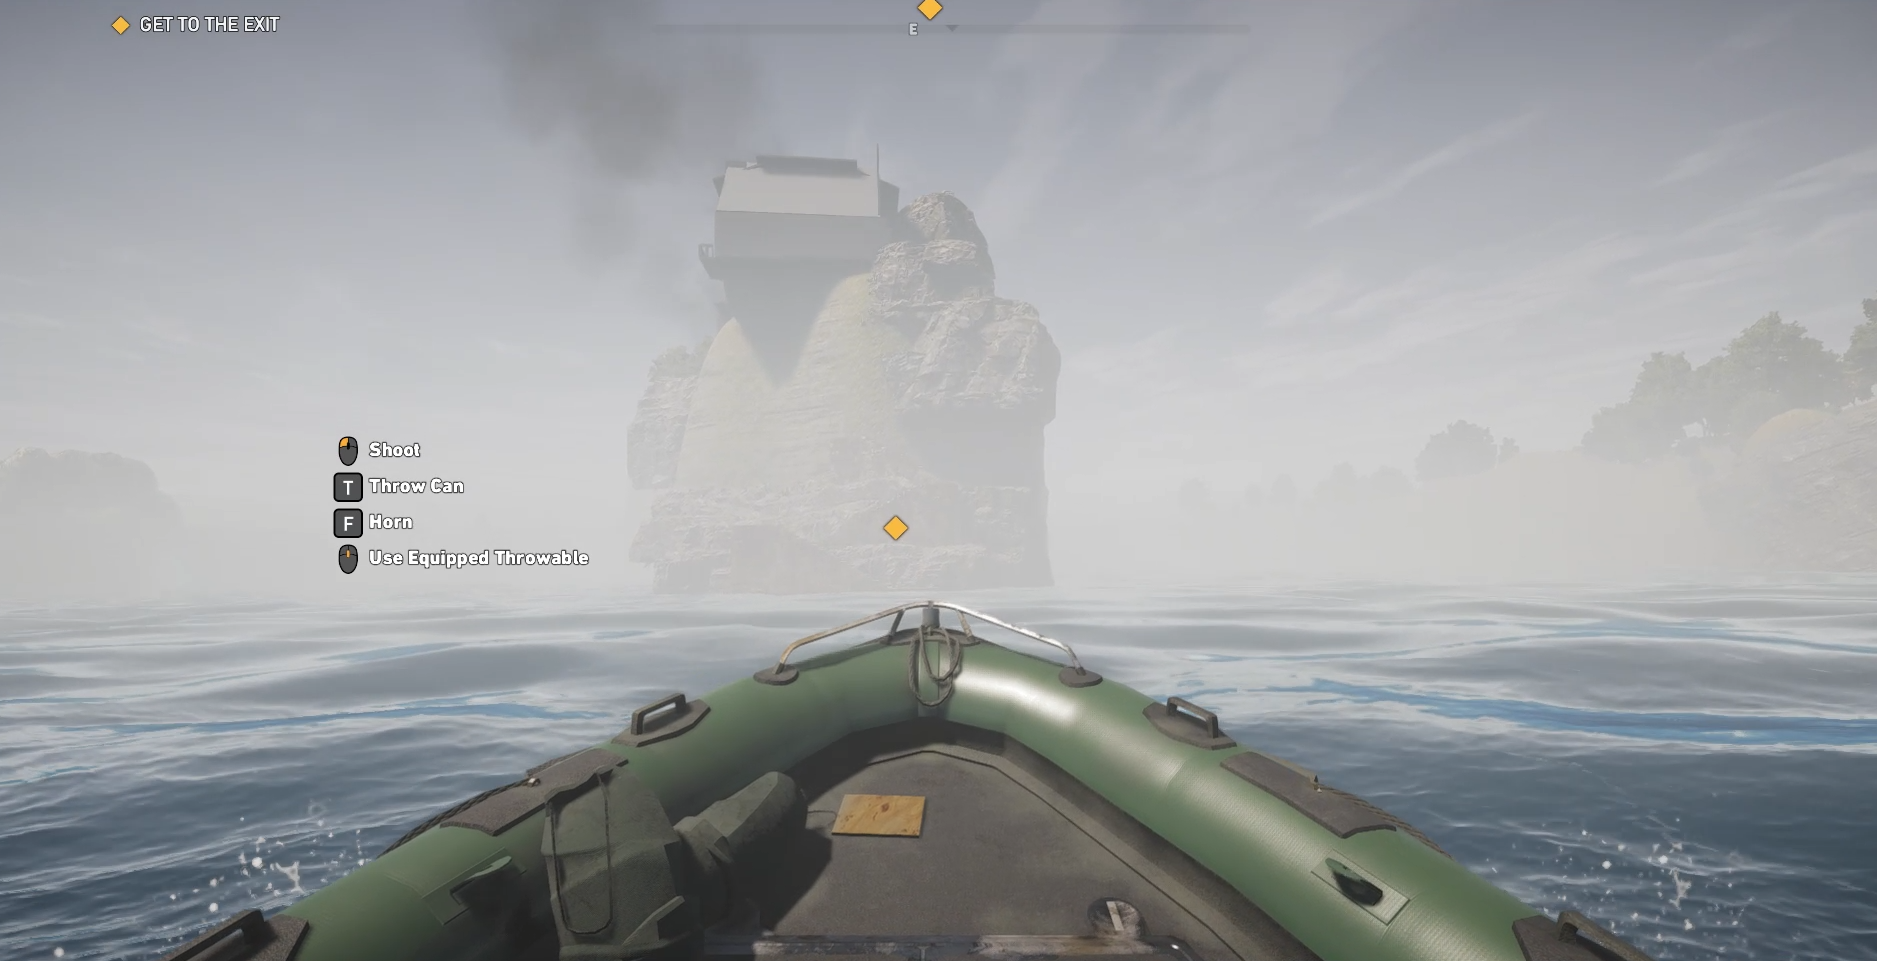
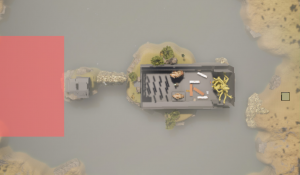
Escape the corrupted temple
- Genre: 3D Action Adventure / FPS
- Type: Encounter design study
- Engine: Far Cry 5 Editor
- Focus: Stealth/assault dual routes, intensity curve, boss climax
- Duration # 2 weeks
- Role: Level designer
Overview
Goal
Vision: Design a layered combat space inside a decaying temple where every route, stealth or assault, offers distinct pacing, risk and reward, culminating in a tense boss fight.
Core Inspirations:
- Horizon Zero Dawn → mythical atmosphere
- Dark Souls 3 → symmetrical spaces with religious environmental storytelling
- Call of Duty WW2 → funnel combat space
Design Goal: Create a combat-focused experience that builds tension through spatial compression, from vast approach, to bottleneck bridge, to the oppressive symmetry of a corrupted temple.
What I Achieved:
-
Designed a clear three-phase pacing arc using environment transitions.
-
Balanced open exploration, linear structure, and arena-style combat.
-
Used architectural scale and symmetry to guide player focus and intensity.
-
Controlled combat flow through deliberate choke points and sightlines.
-
Achieved strong visual storytelling, sacred structure transformed into battleground.
Level Overview & Technique Highlights
Setting & Synopsis: The level takes place on a remote Southeast Asian island, officially uninhabited but hiding the ruins of an ancient Hindu temple deep within its jungle-covered interior. A criminal cartel has taken over the site, turning the sacred ruins into a fortified base for their drug operations.
The player assumes the role of a special operations scout sent for reconnaissance, but when his extraction transport malfunctions, he’s left stranded. His only chance of escape is to infiltrate the cartel’s base, reach the helicopter on the far side of the temple, and secure it for extraction.
The mission can unfold through stealth or direct confrontation, challenging the player to adapt and survive in an environment that blends ancient mysticism with modern brutality.
Cover placement
Technique: Cover placement is used to balance open combat spaces, providing the player with multiple entry points and defensive options during firefights. Instead of leaving large empty areas, cover elements are strategically distributed to ensure the player can move, flank, and recover without being overwhelmed by superior enemy numbers.
Context: Because combat encounters often pit the player against multiple enemies, the cover layout is designed to maintain fairness and tactical flexibility. Each area offers several safe positions that encourage dynamic movement rather than static defense, supporting both cautious and aggressive playstyles.
Technique Detail:
Crates: The most common cover type, used to break up large open spaces and guide player movement through combat zones.
Columns: Oversized stone structures placed to offer reliable protection from heavy fire inside the temple.
Vehicles & Trailers: Scarcer but strategically positioned elements that provide solid cover in key areas, such as the bridge or the final boss arena.
Alternative routes
Technique: Alternative routes are implemented to support player agency and replayability, offering distinct paths for stealth and assault approaches. Each route is designed to accommodate different playstyles while maintaining balance and tension across the level.
Context: The dual-path design, stealth & assault, are tuned to offer engaging pacing, balanced challenge, and thoughtful resource management, maintaining flow and tension throughout the temple complex.
Technique Detail:
Assault Route (Red Path): This path prioritizes movement through open areas with abundant mid-cover (crates, debris, vehicles). Players are encouraged to engage enemies head-on, using cover to advance and control combat tempo.
Stealth Route (Green Path): Designed with lateral and vertical navigation options, this route allows players to bypass most enemy groups through flanking corridors, elevated walkways, and shadowed spaces. Visual occlusion and enemy line-of-sight are used to reward observation and timing.
Intensity curve
Technique: A pacing/intensity curve was applied to shape the player’s emotional and mechanical engagement throughout the level. This ensures a rhythm of tension and release, balancing combat encounters with exploration and anticipation to maintain flow and prevent fatigue.
Context: The level follows a six-stage intensity curve, designed to gradually escalate both combat complexity and environmental pressure, leading to a climactic confrontation and a brief resolution.
Technique Detail:
Starting slow: The player begins in a quiet exploration zone with no threats.
First action: A small-scale skirmish introduces the basic combat loop and enemy behavior.
Breather before intensity climb: A short traversal section provides contrast before the next spike.
- Main action/rapid climb: The main combat area introduces more enemies, and multi-angle threats, demanding active positioning and tactical awareness.
- Climax: The peak of intensity. A large-scale encounter in an open arena.
- Denouement: After victory, intensity drops sharply. A brief traversal allows the player to decompress.
Walkthrough
Beat 1: Approach
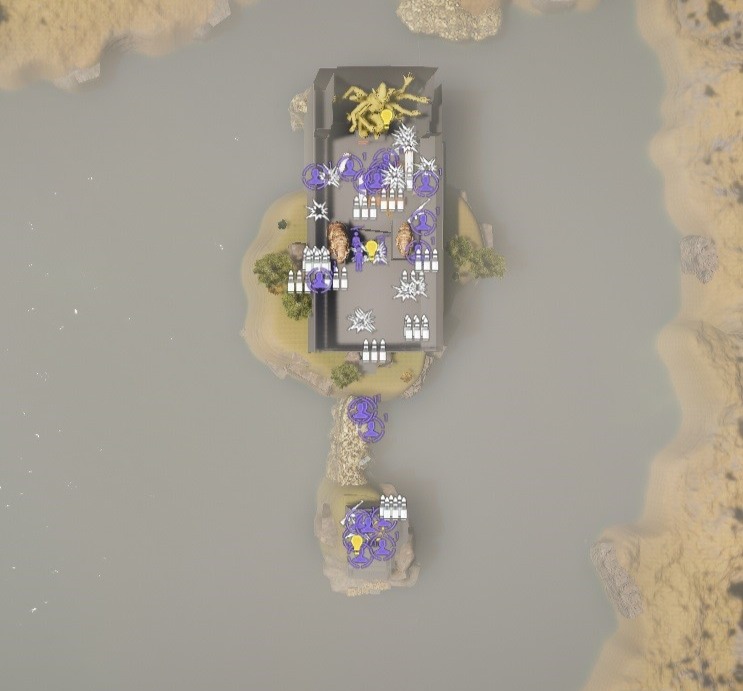
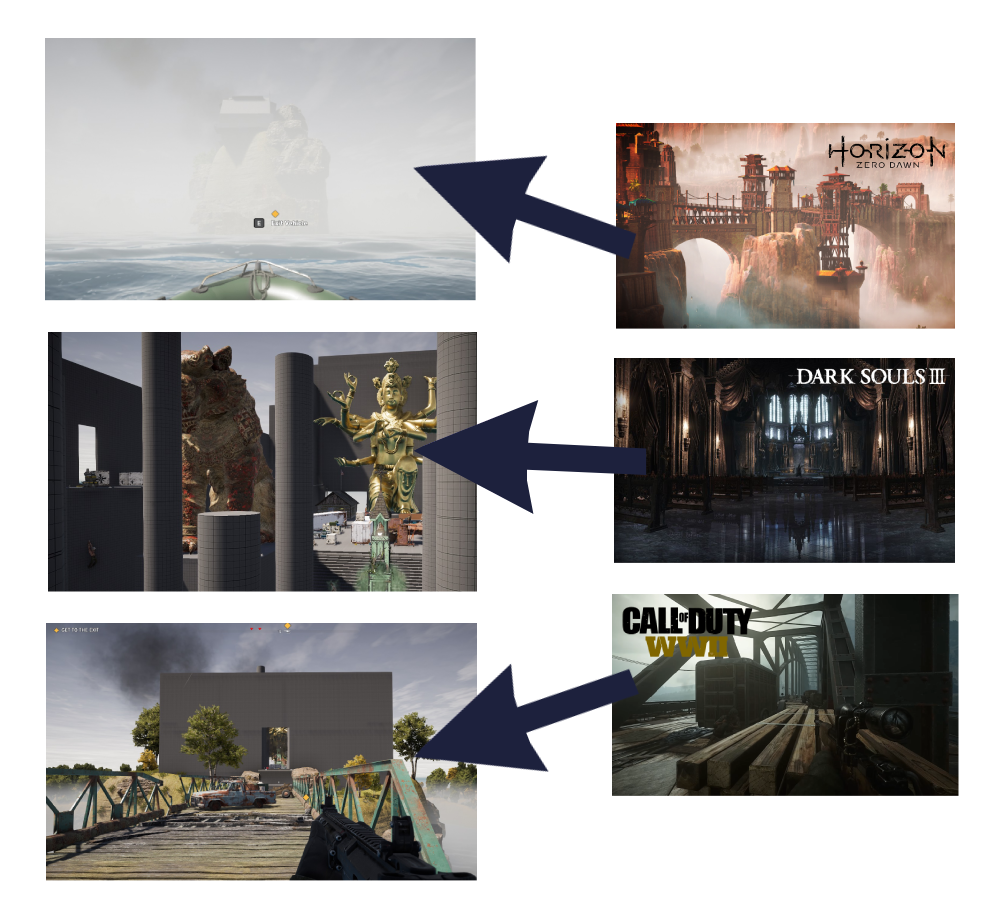
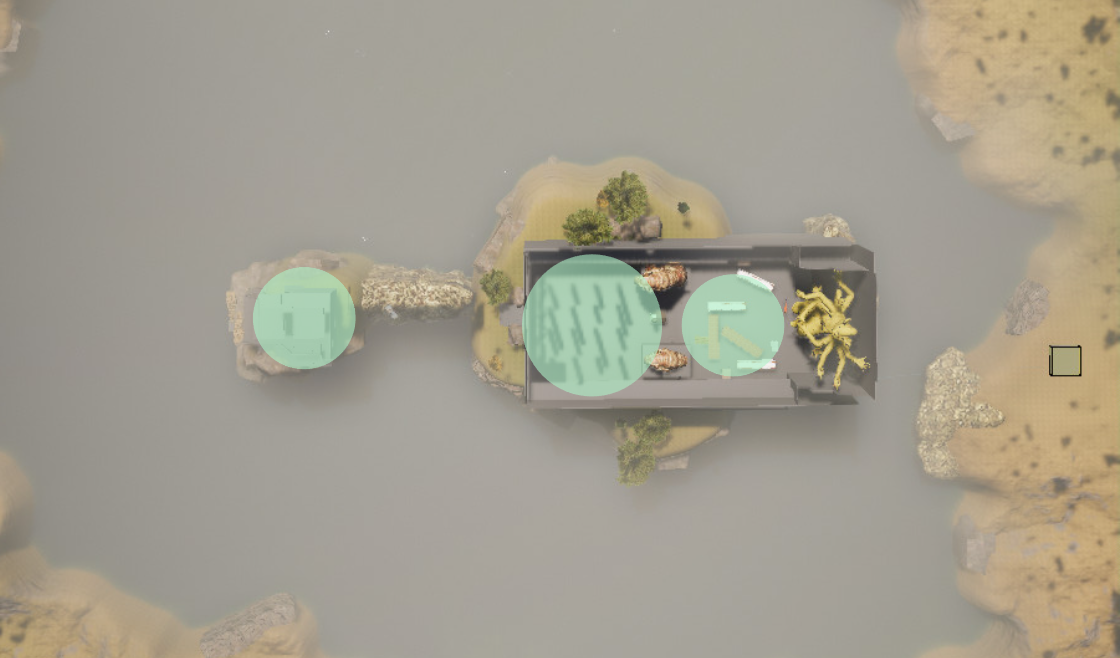
Players begin in an speedboat, ready to approach the temple compound. The whole lake is explorable, but the only entrance is through the steps that lead to the first, smaller building.
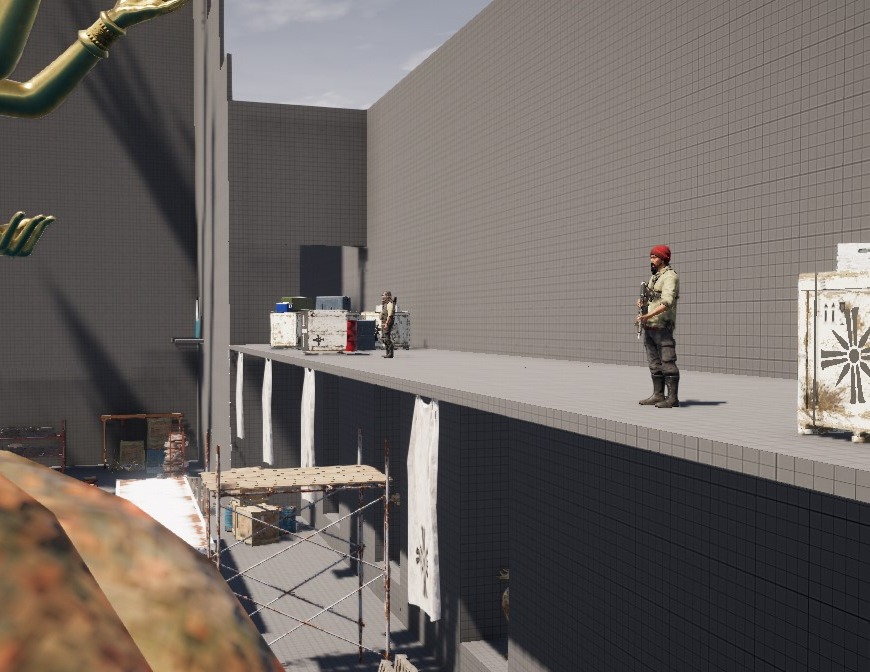
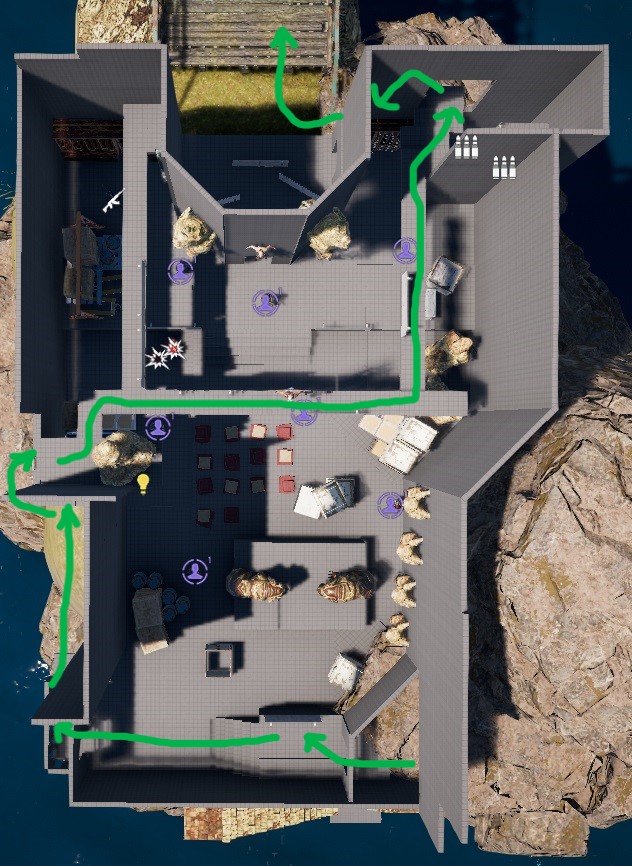
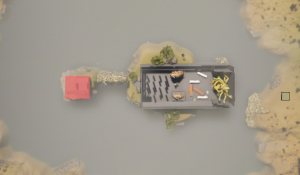
Beat 2: First combat
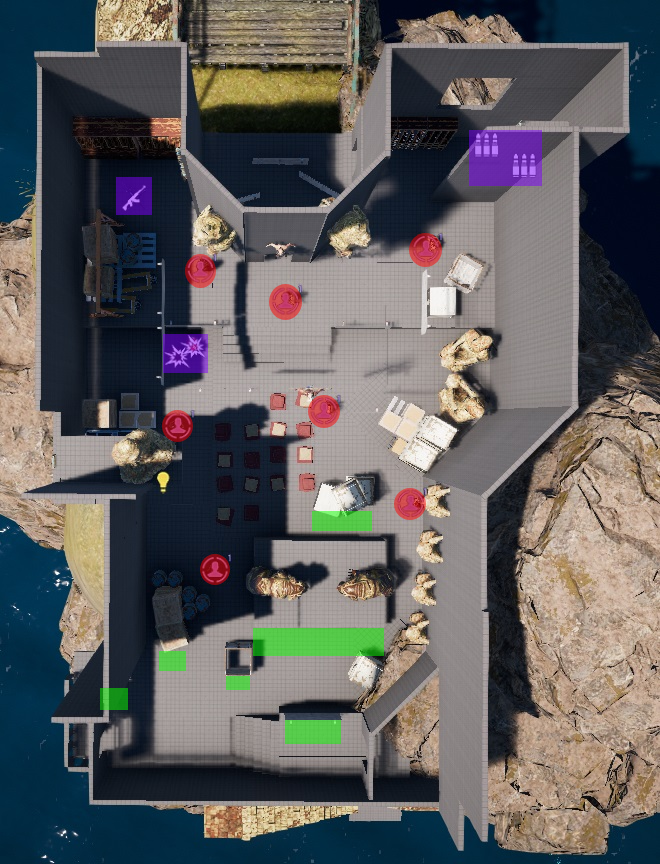
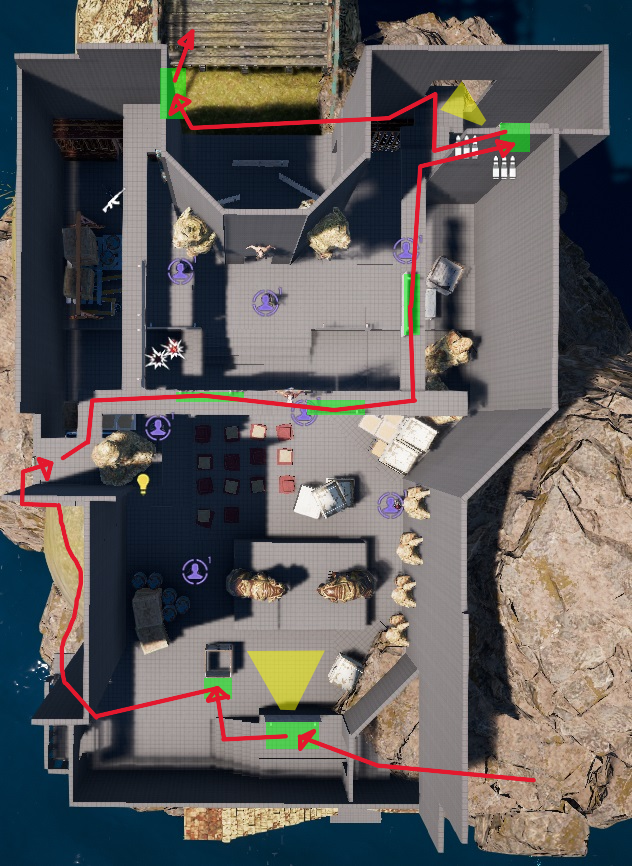
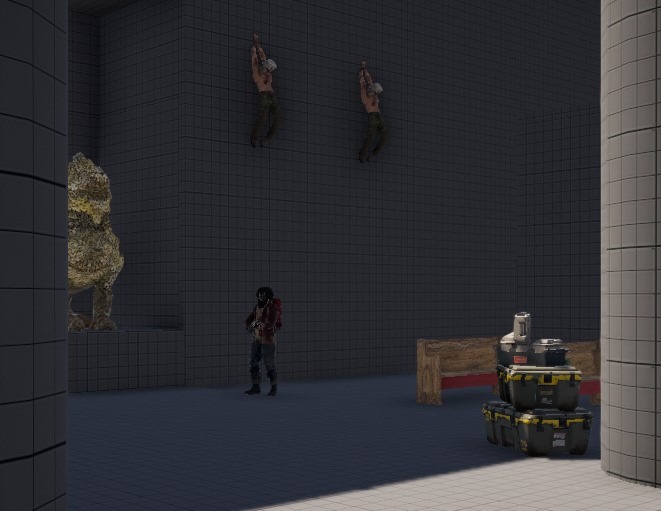
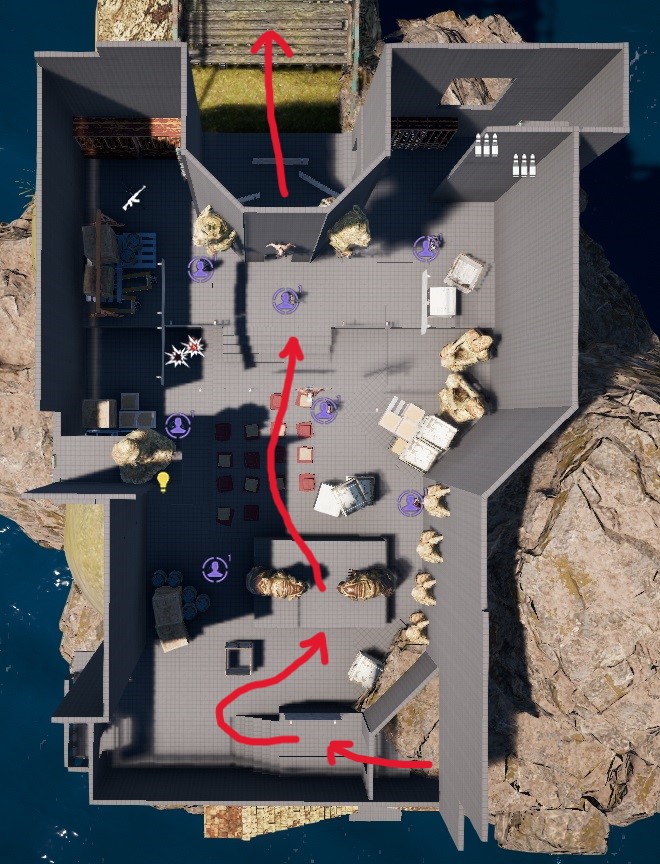
The player enters the first building and faces a small group of guards. The encounter is designed to introduce core combat mechanics and enemy behavior in a controlled space, allowing players to adapt before the challenge escalates.
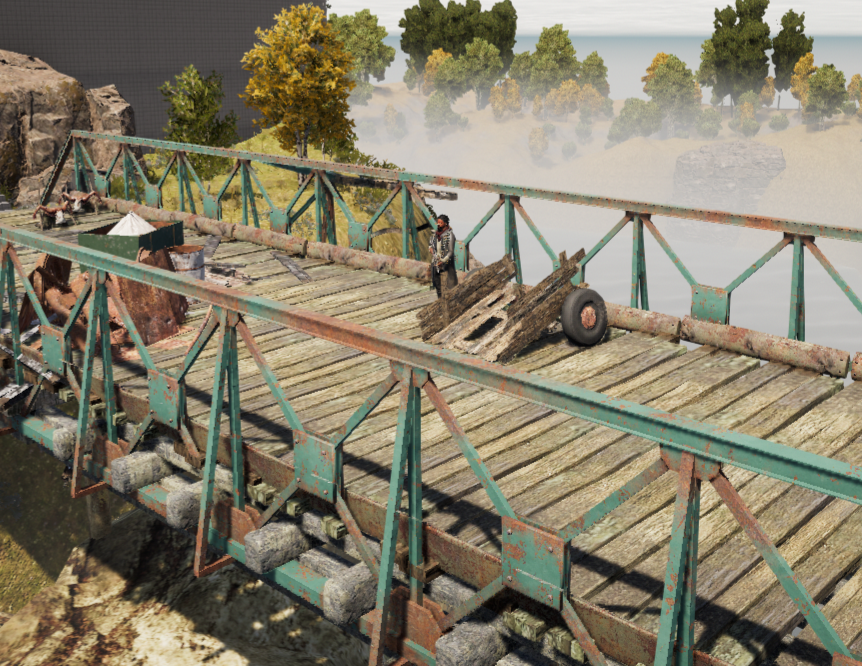
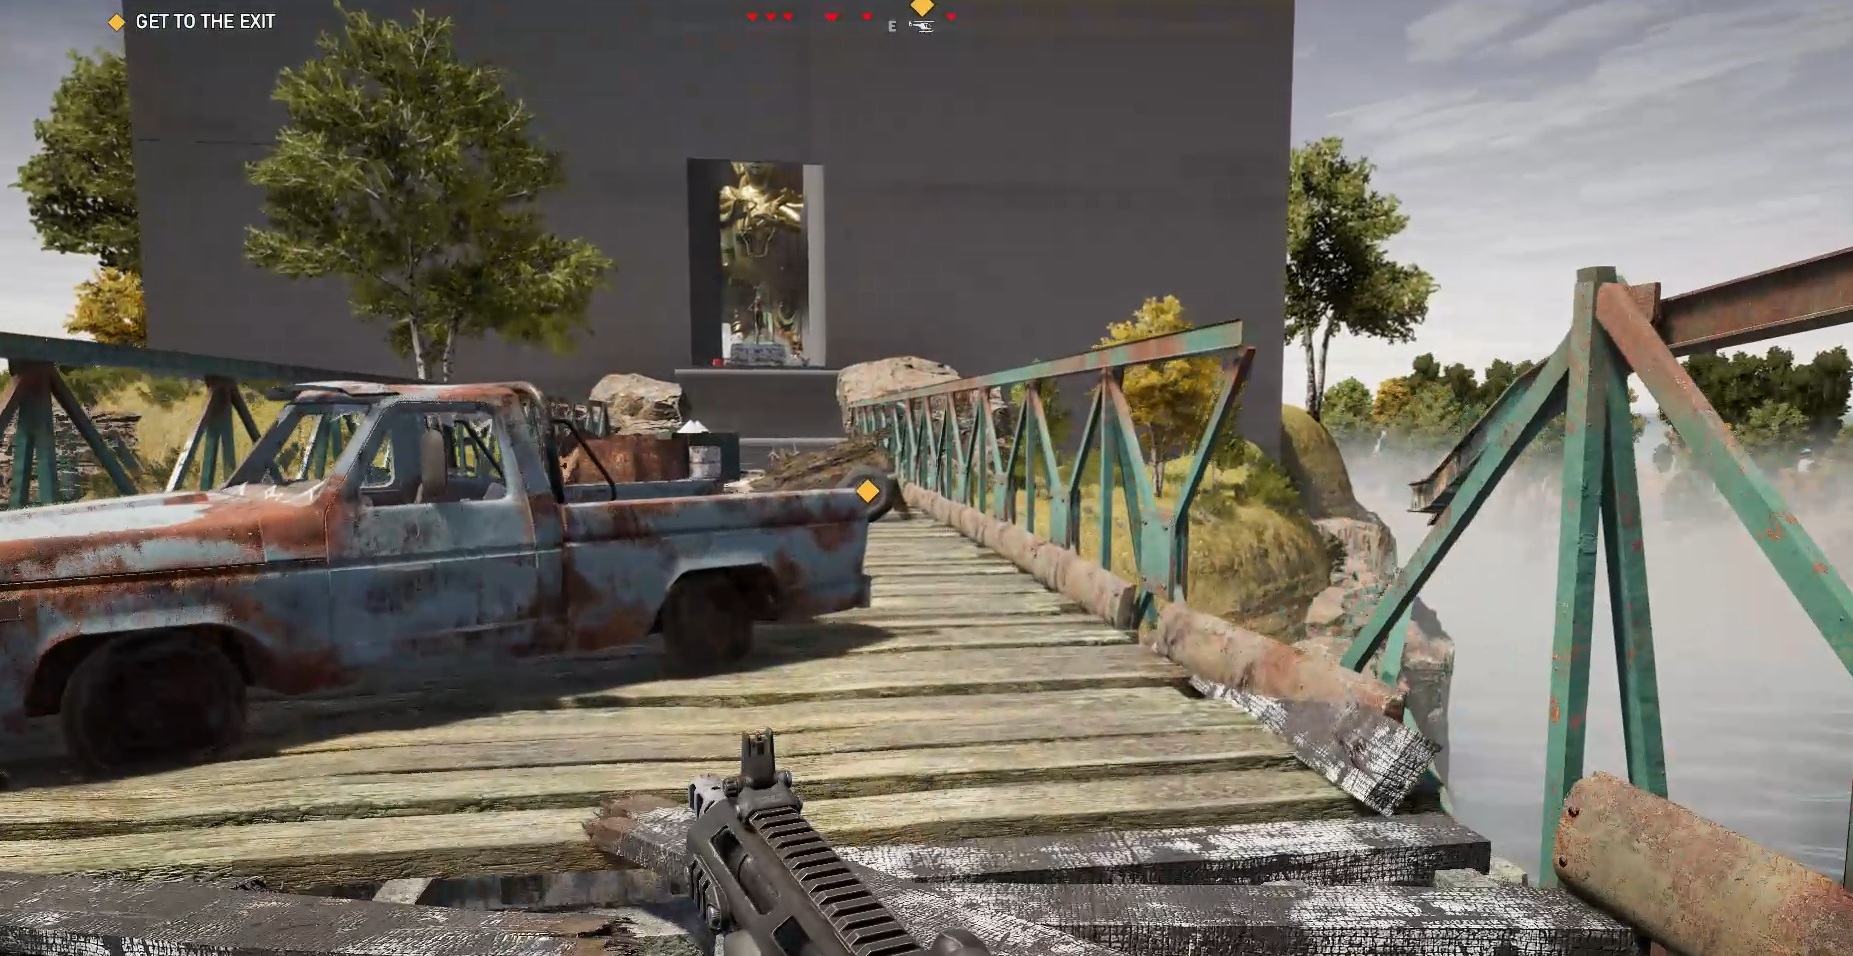
Beat 3: Easy traversal
After the first fight, the player moves between buildings. This short traversal section offers a moment of recovery, before the next major encounter.
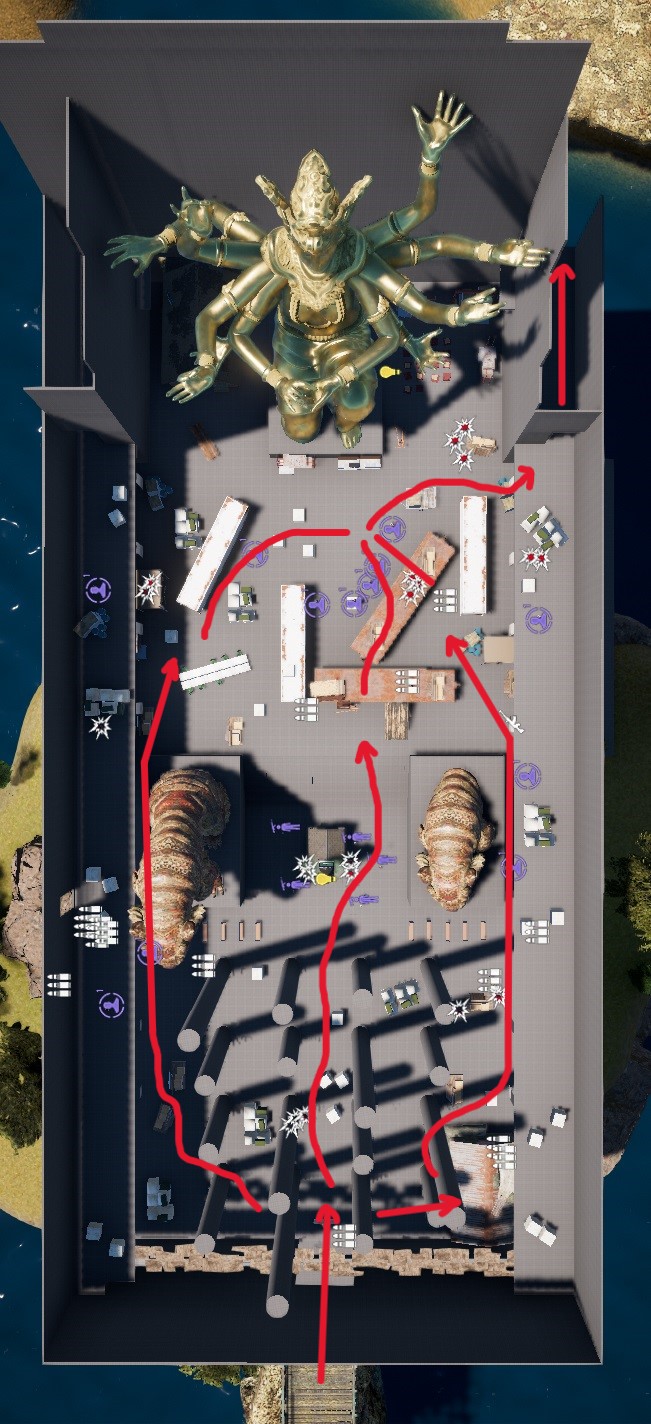
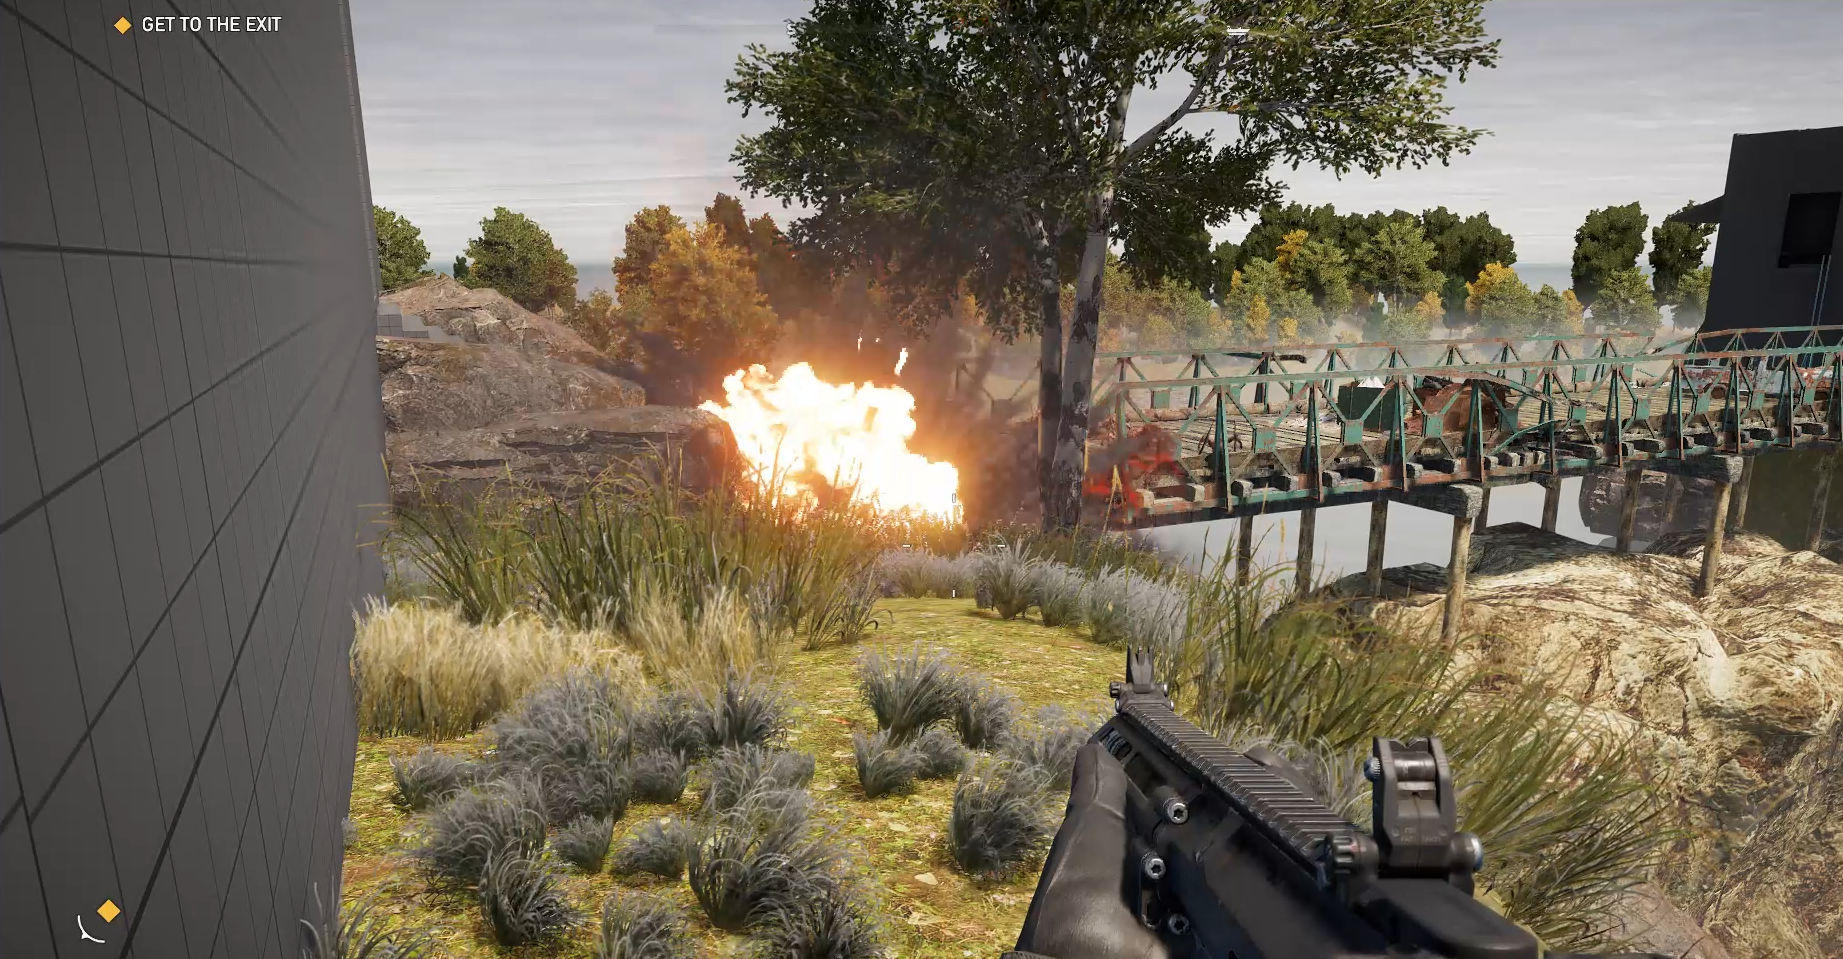
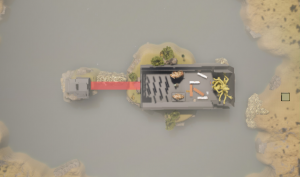
Beat 4: Main fight
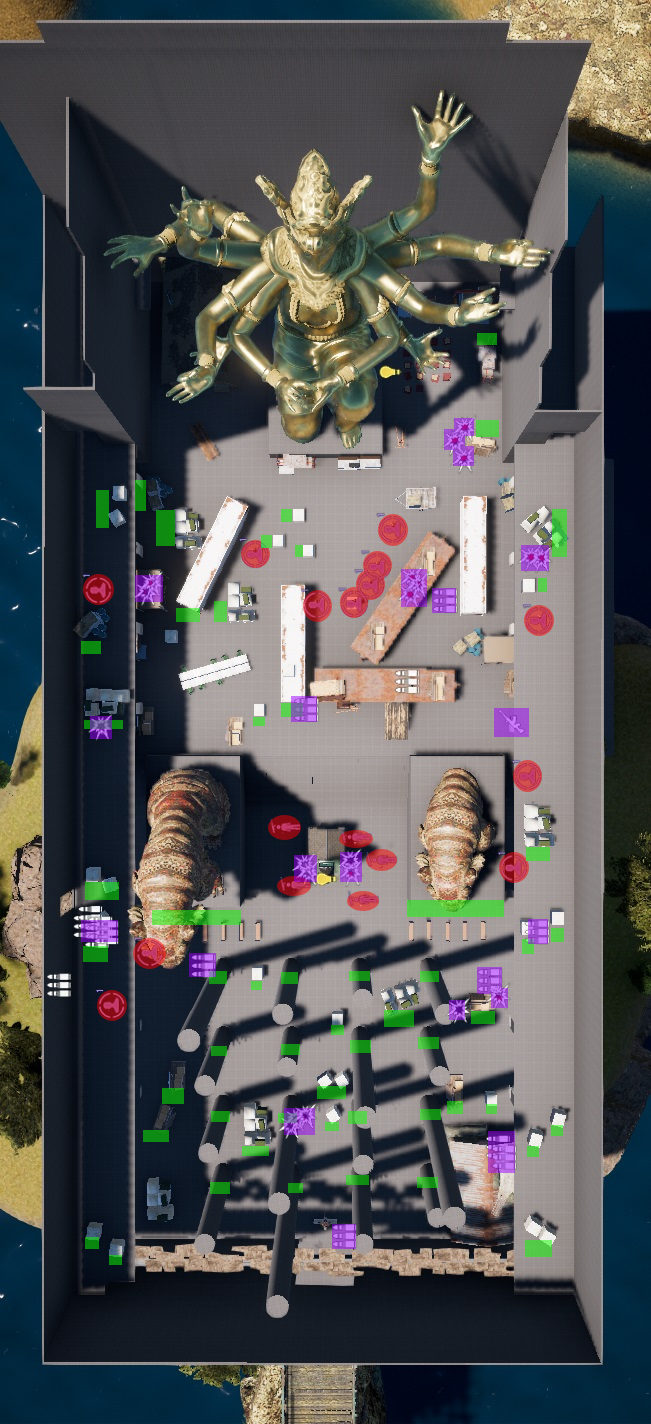
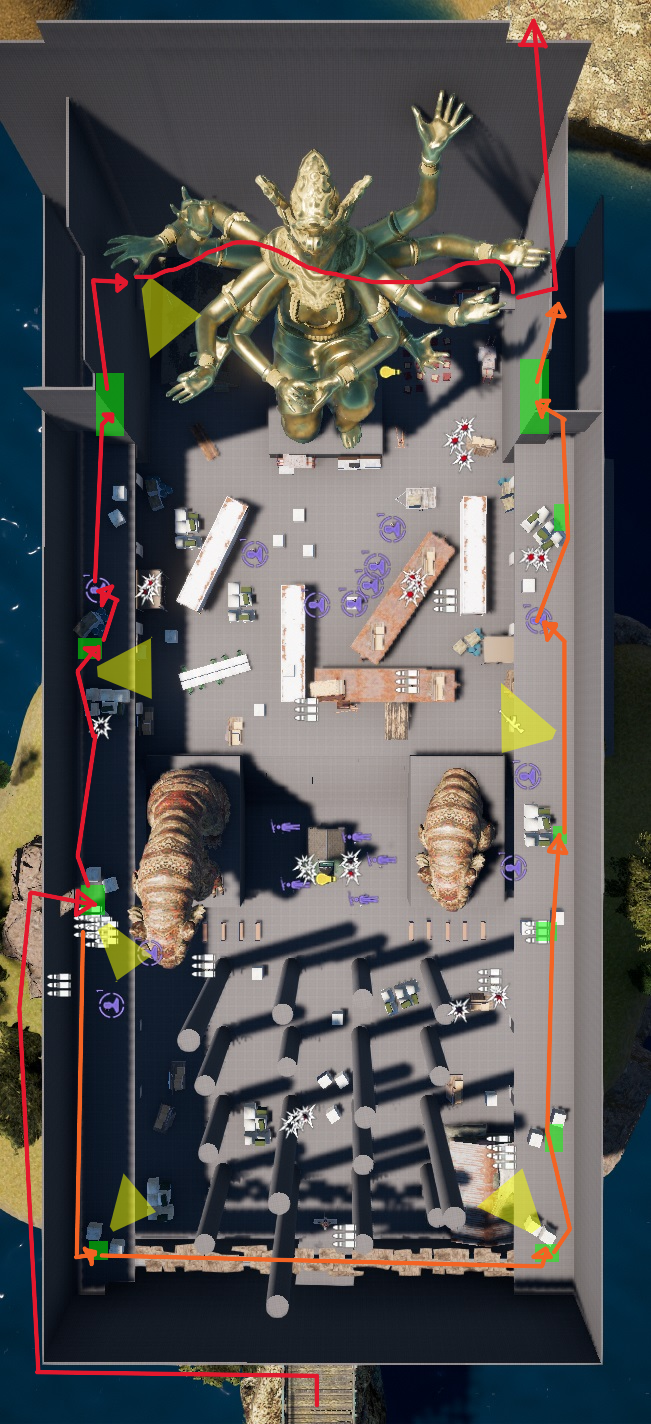
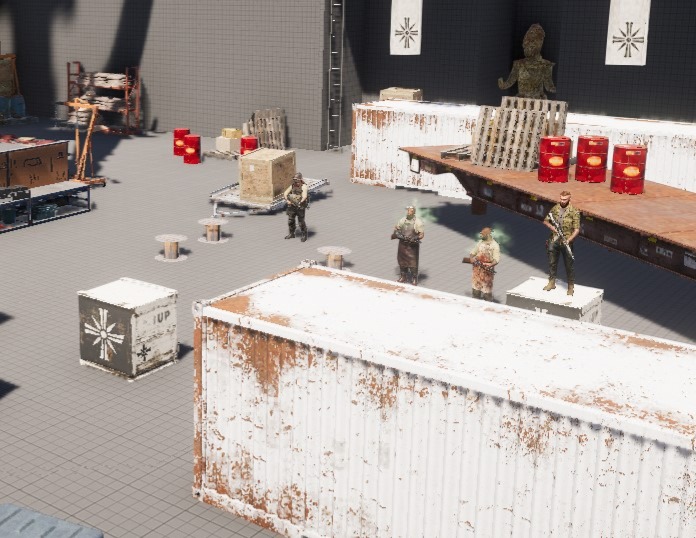
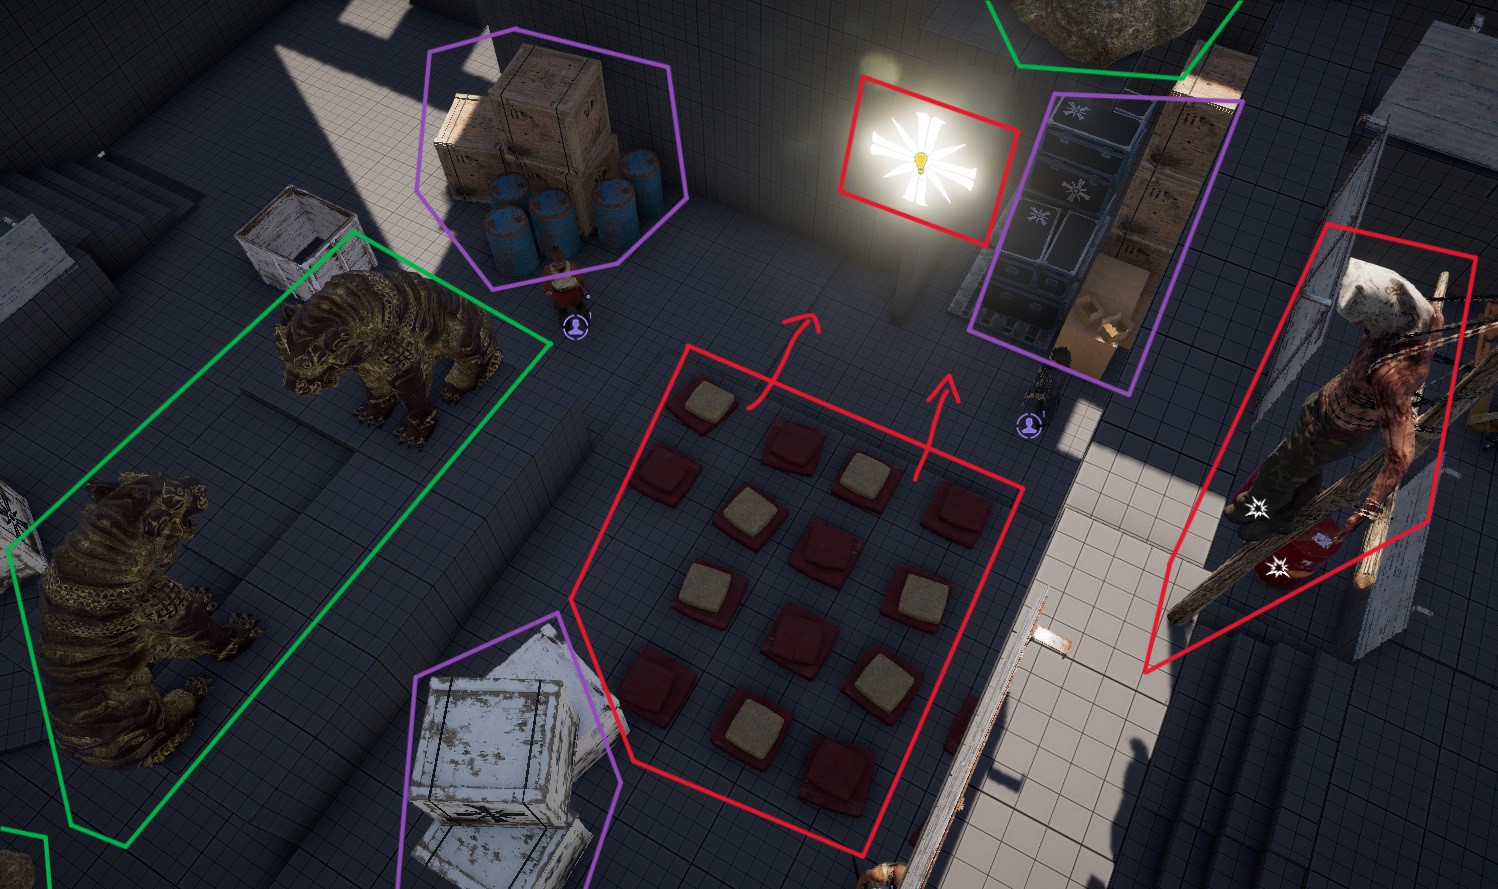
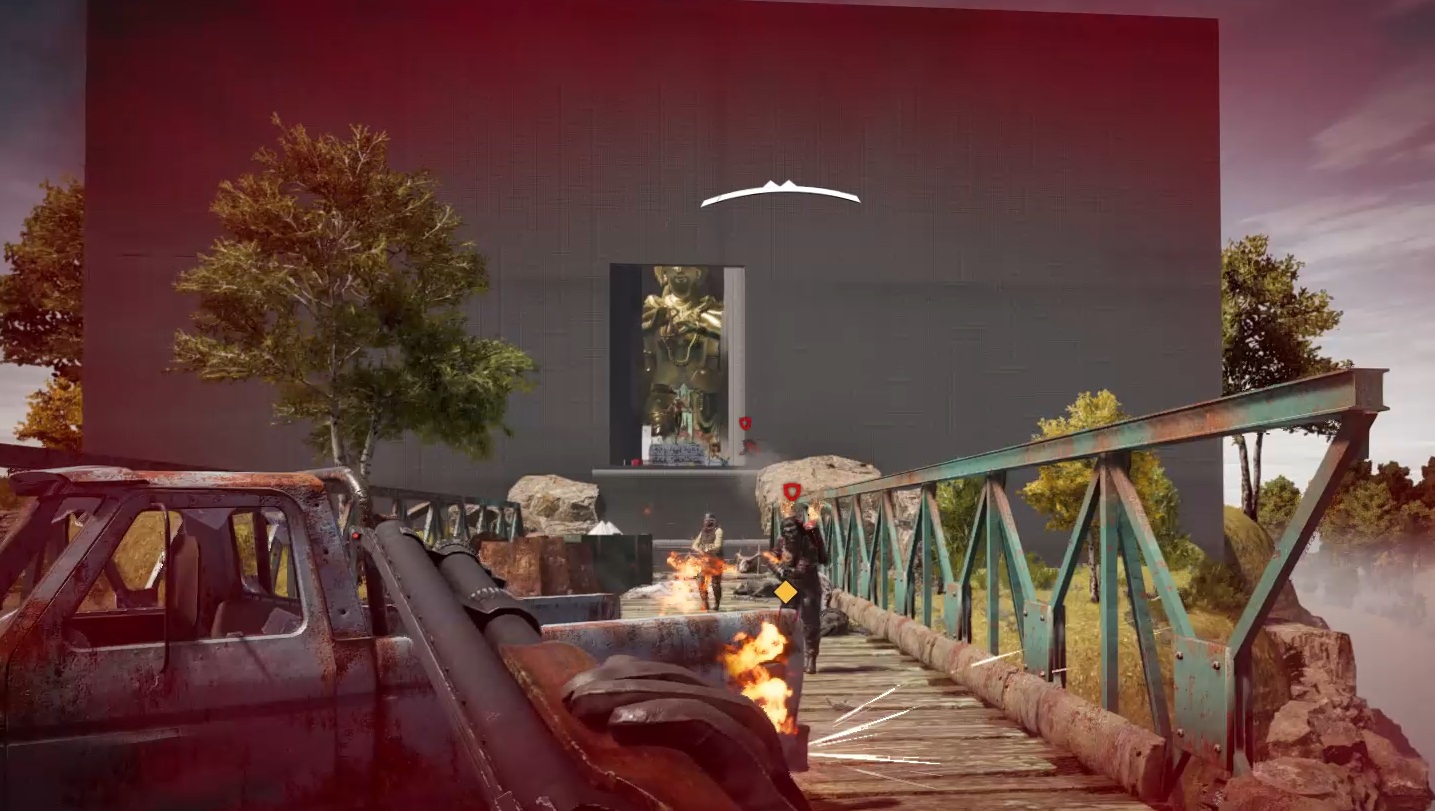
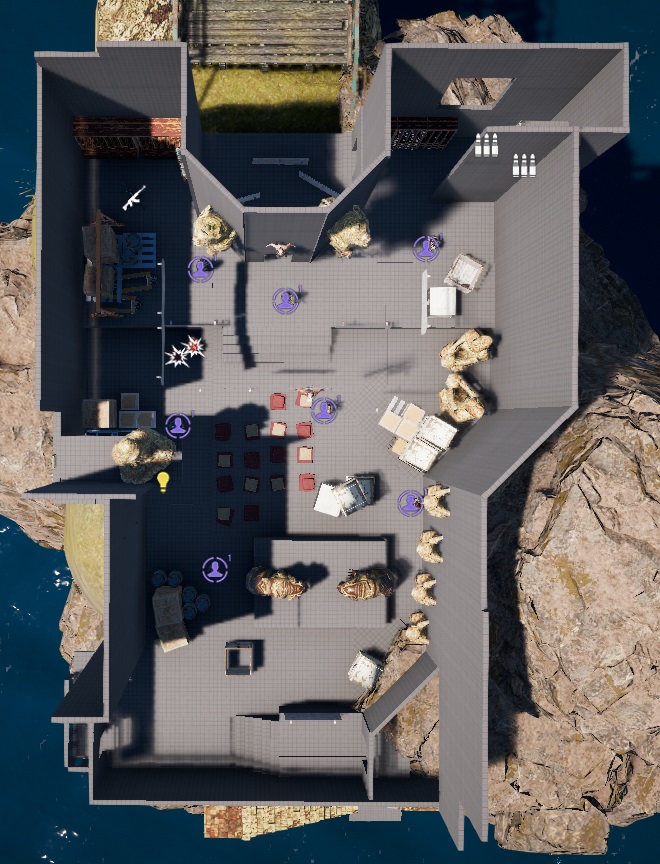
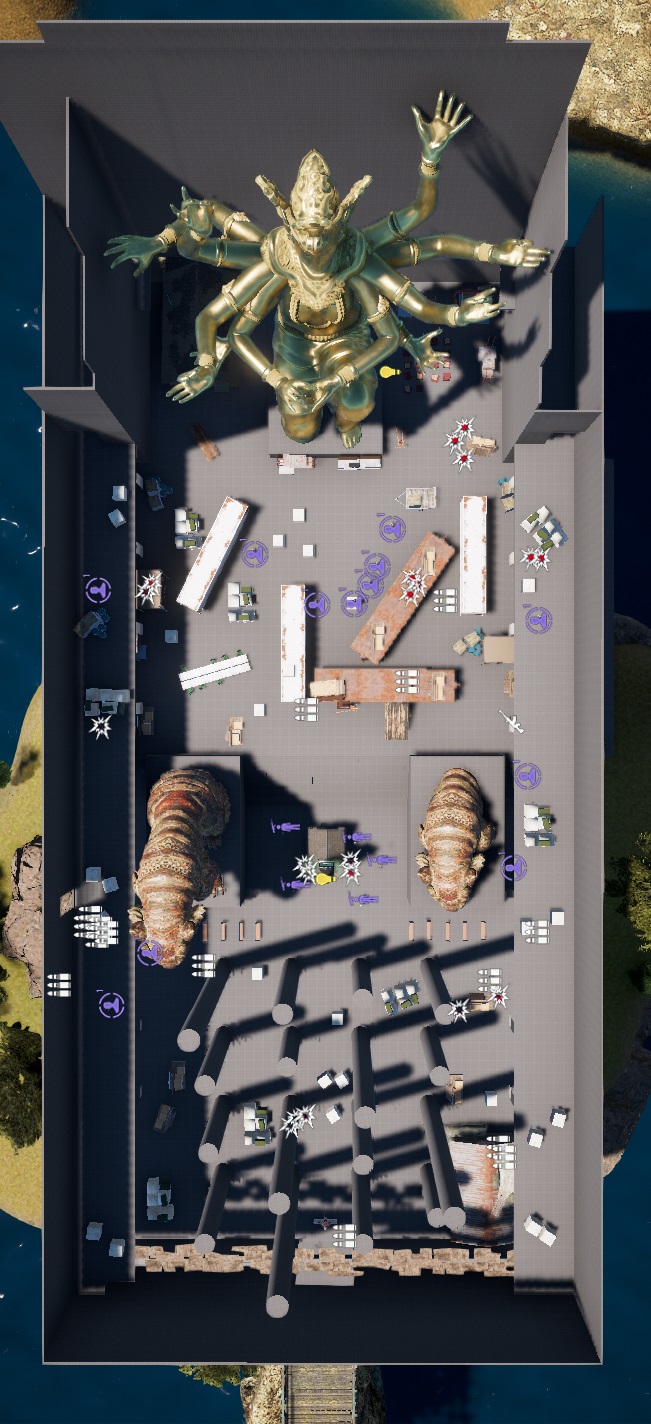
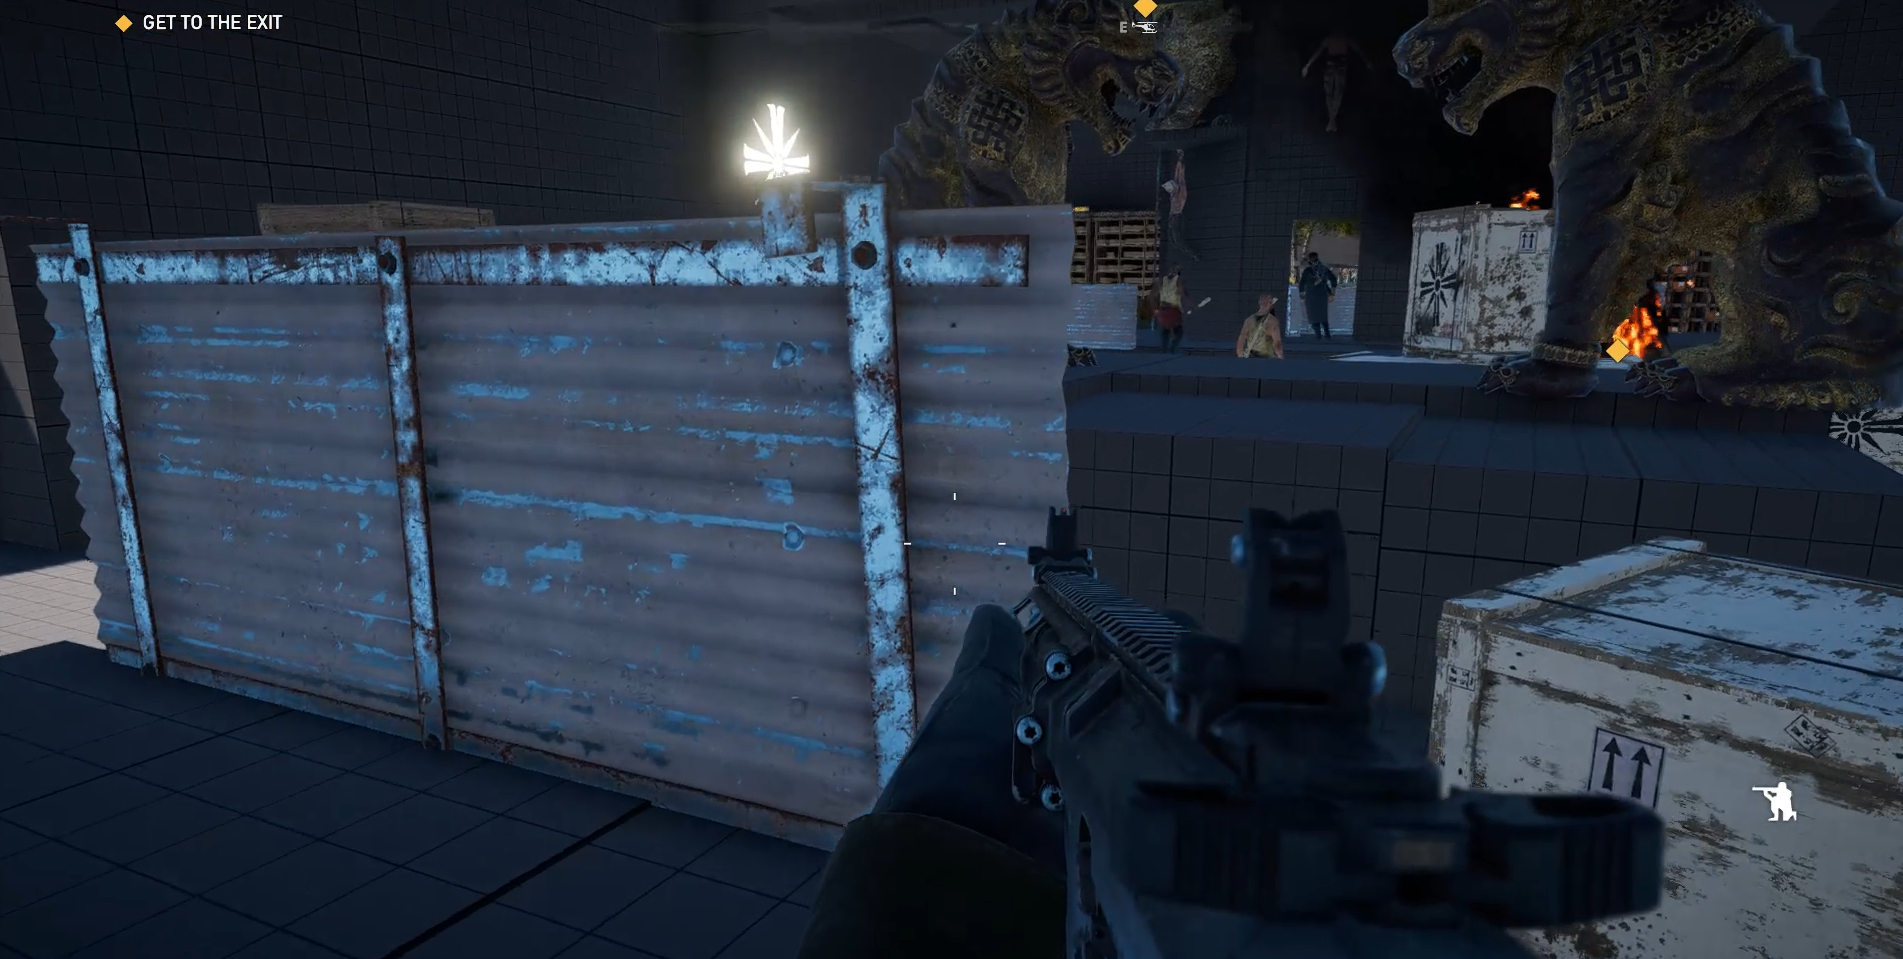
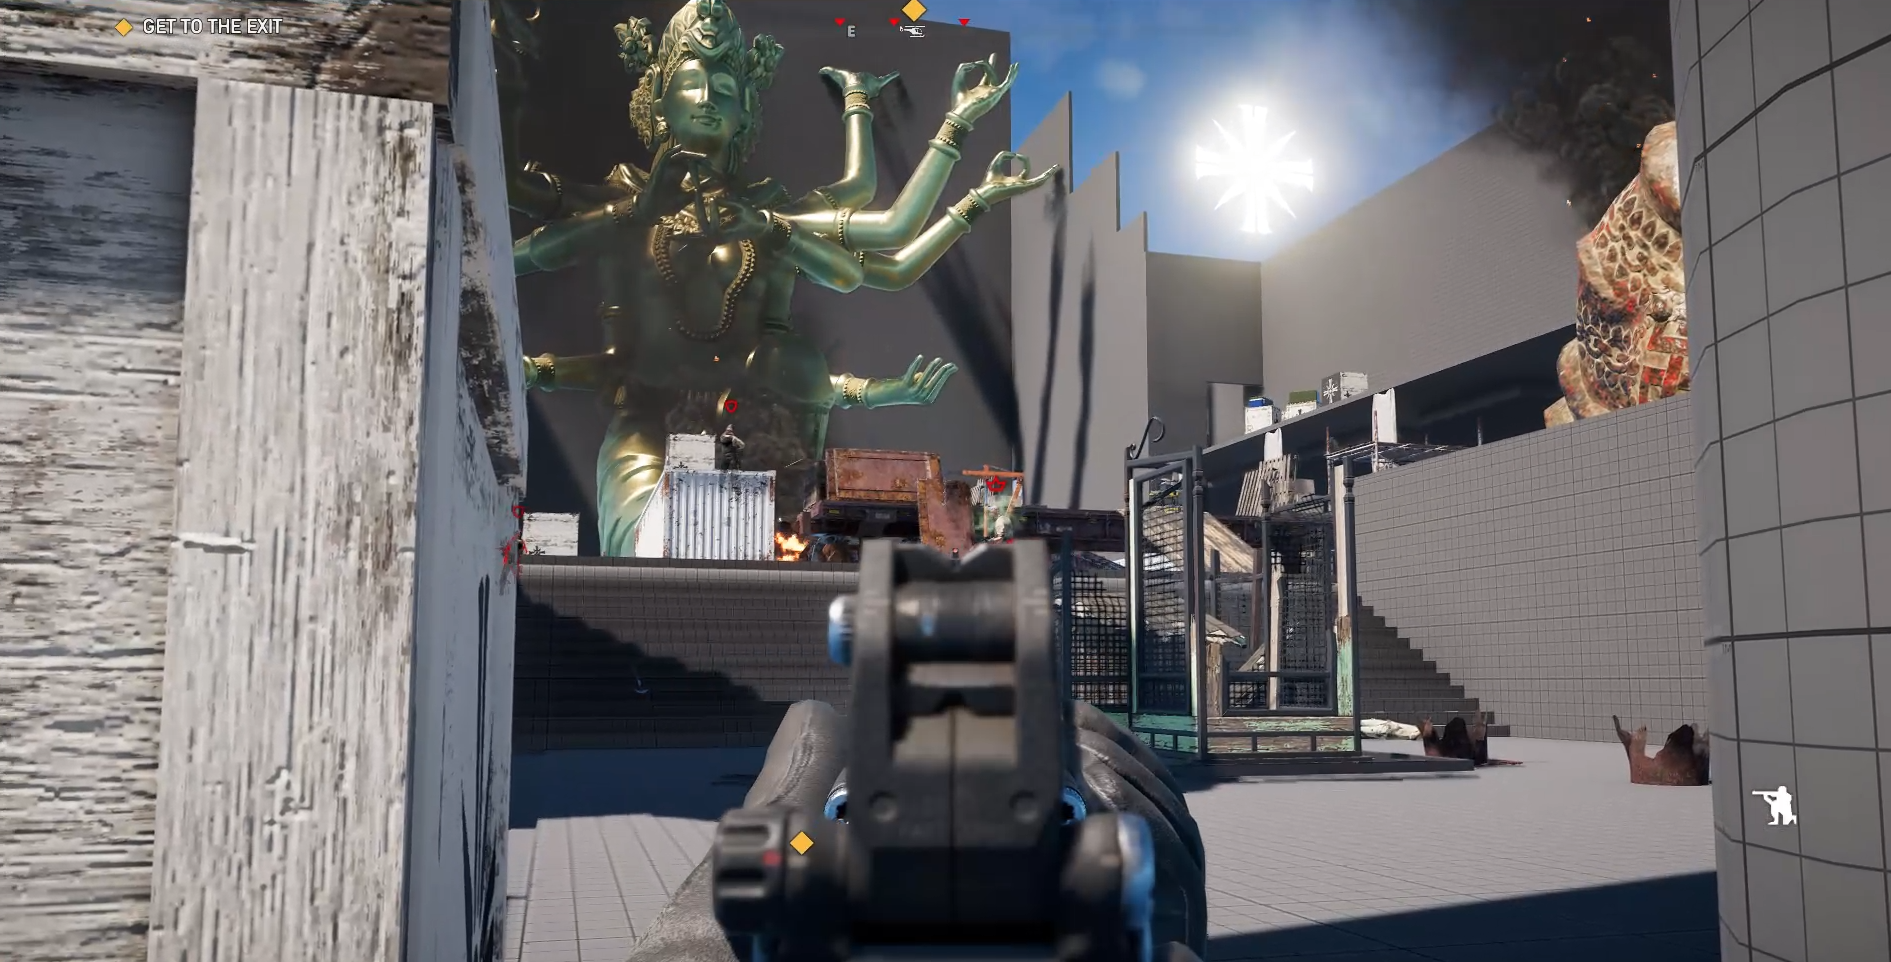
The player reaches the main temple, now heavily fortified by the cartel. Combat intensifies with multiple enemy groups, crossfire angles, and cover-based engagements across open areas.
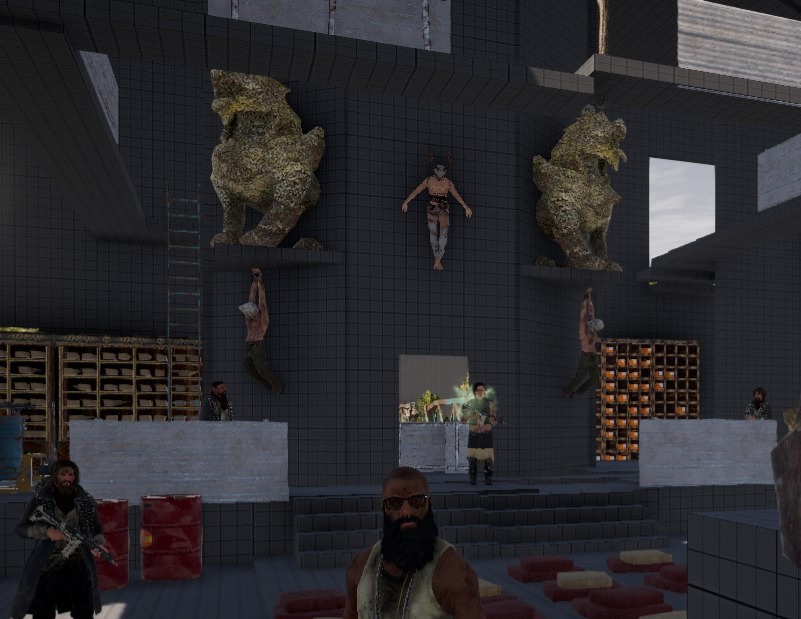
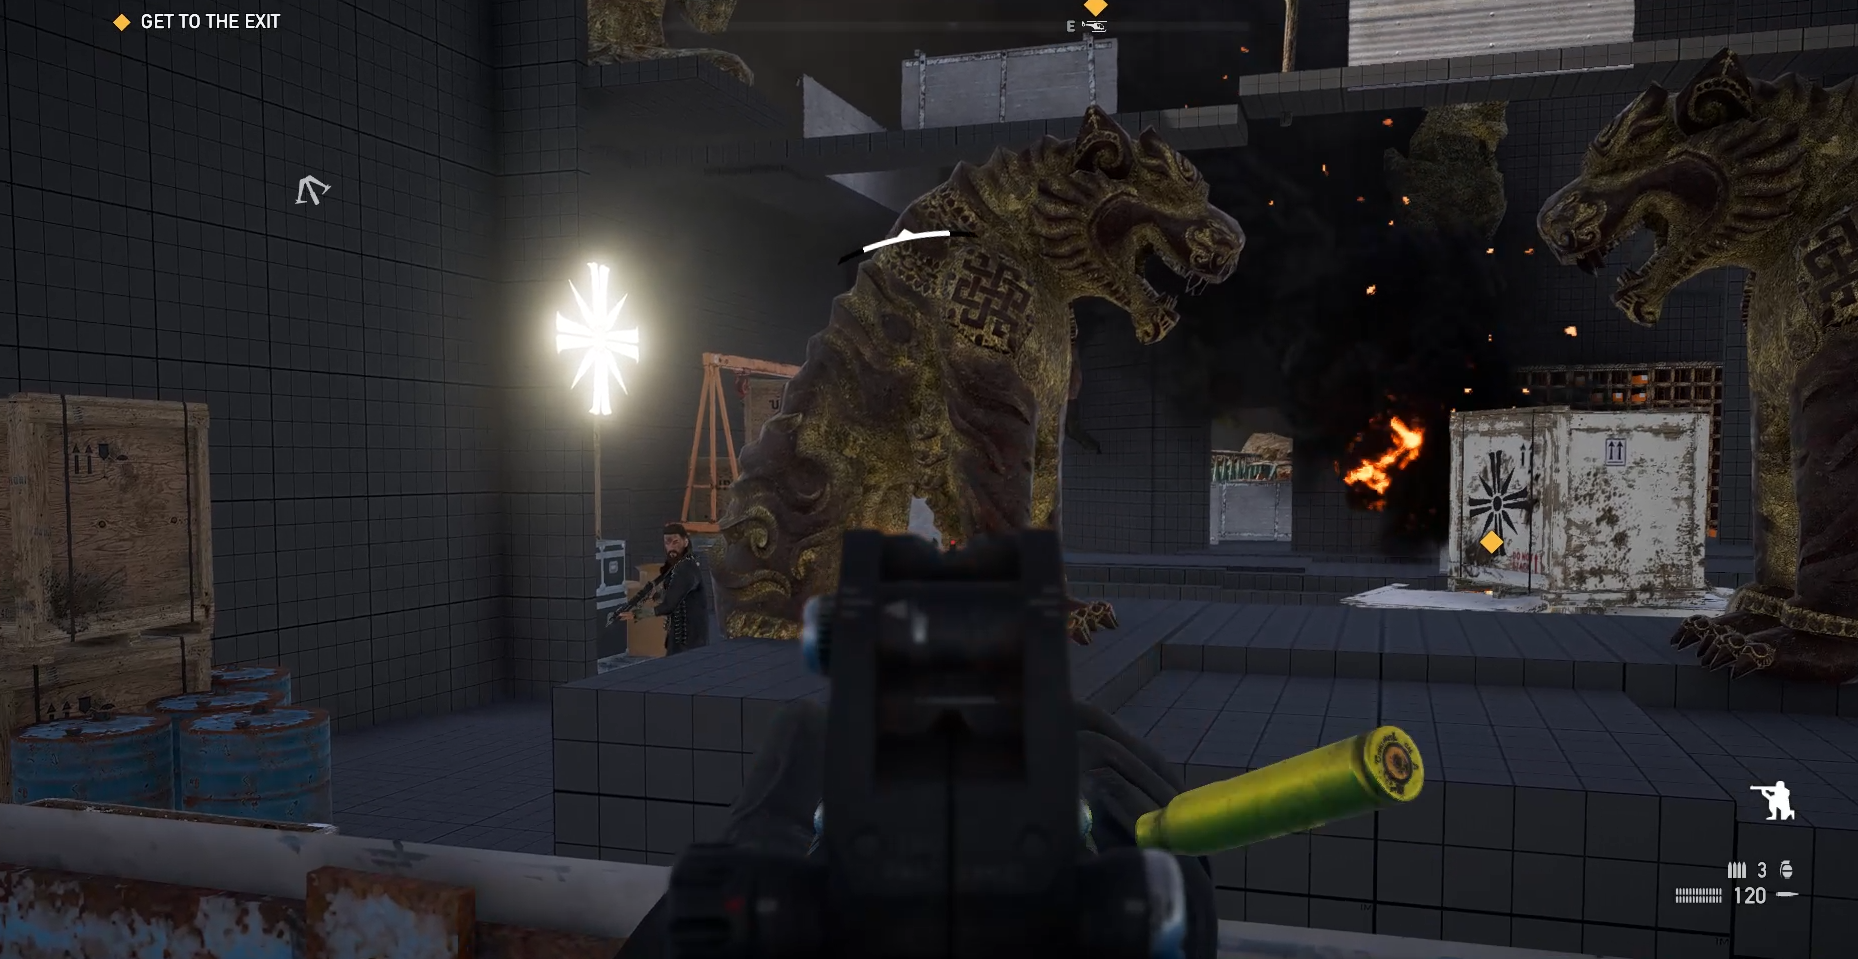
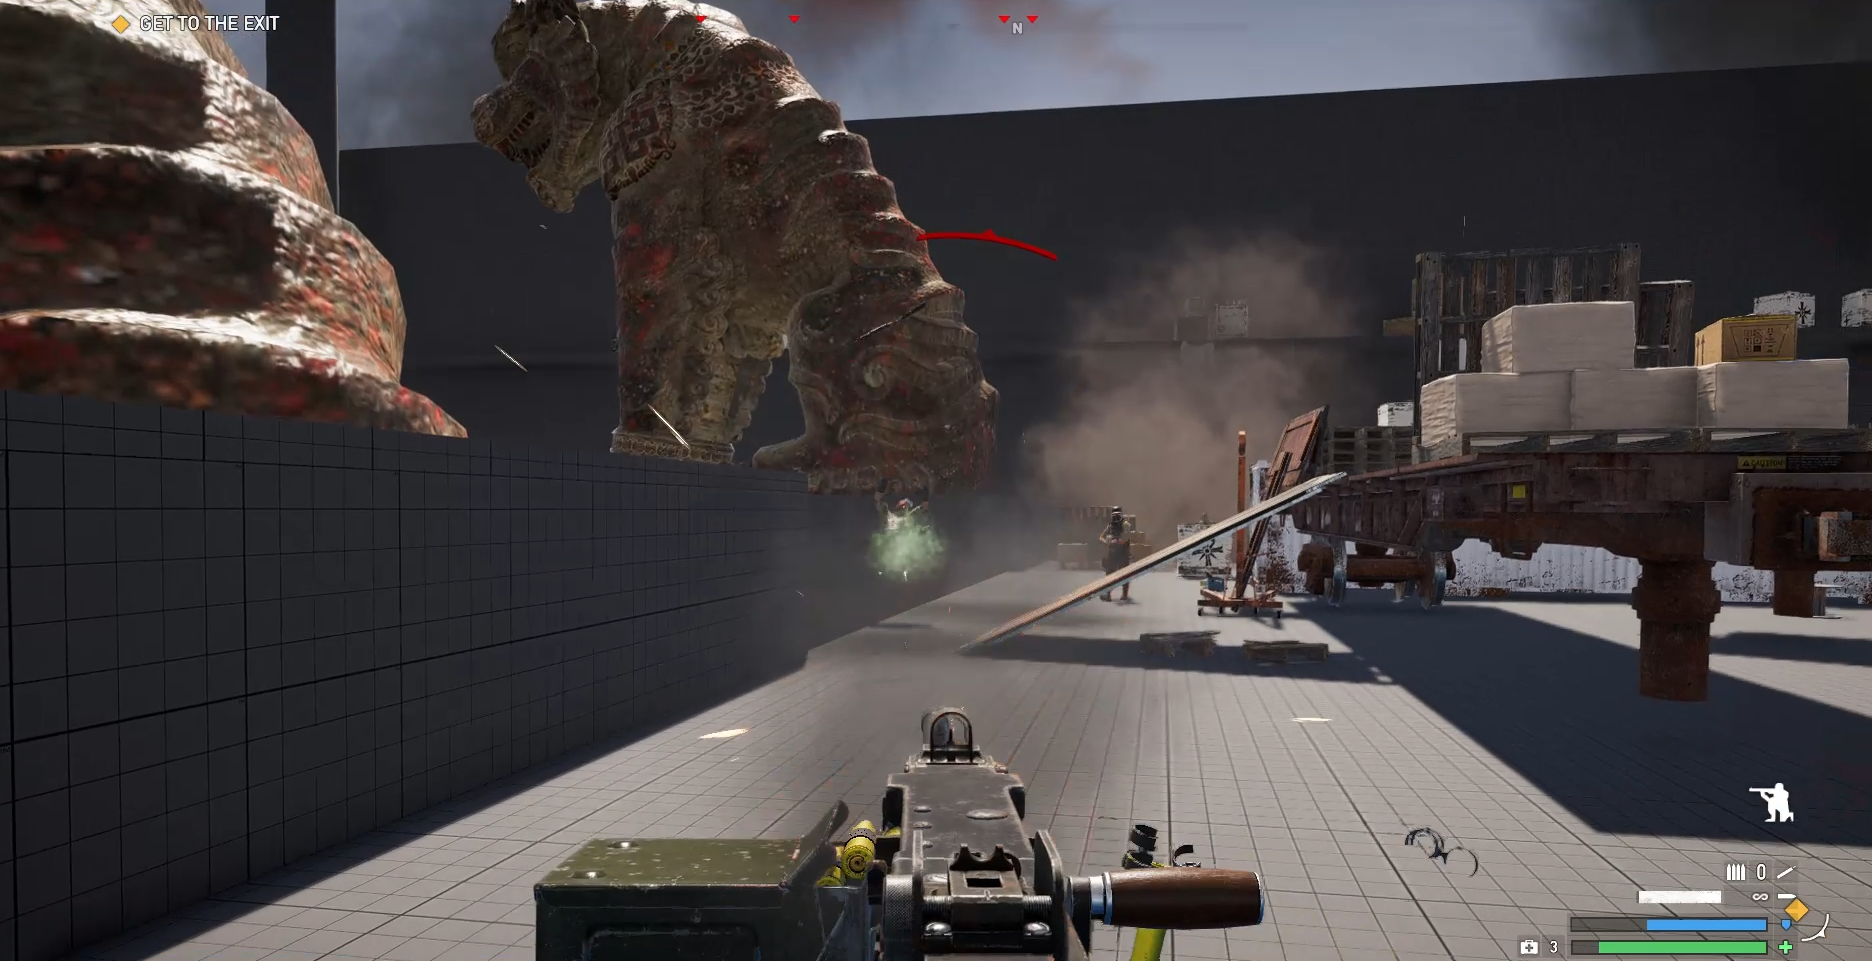
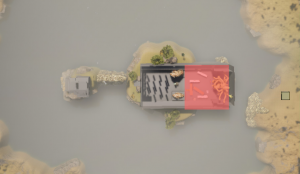
Beat 5: Climax
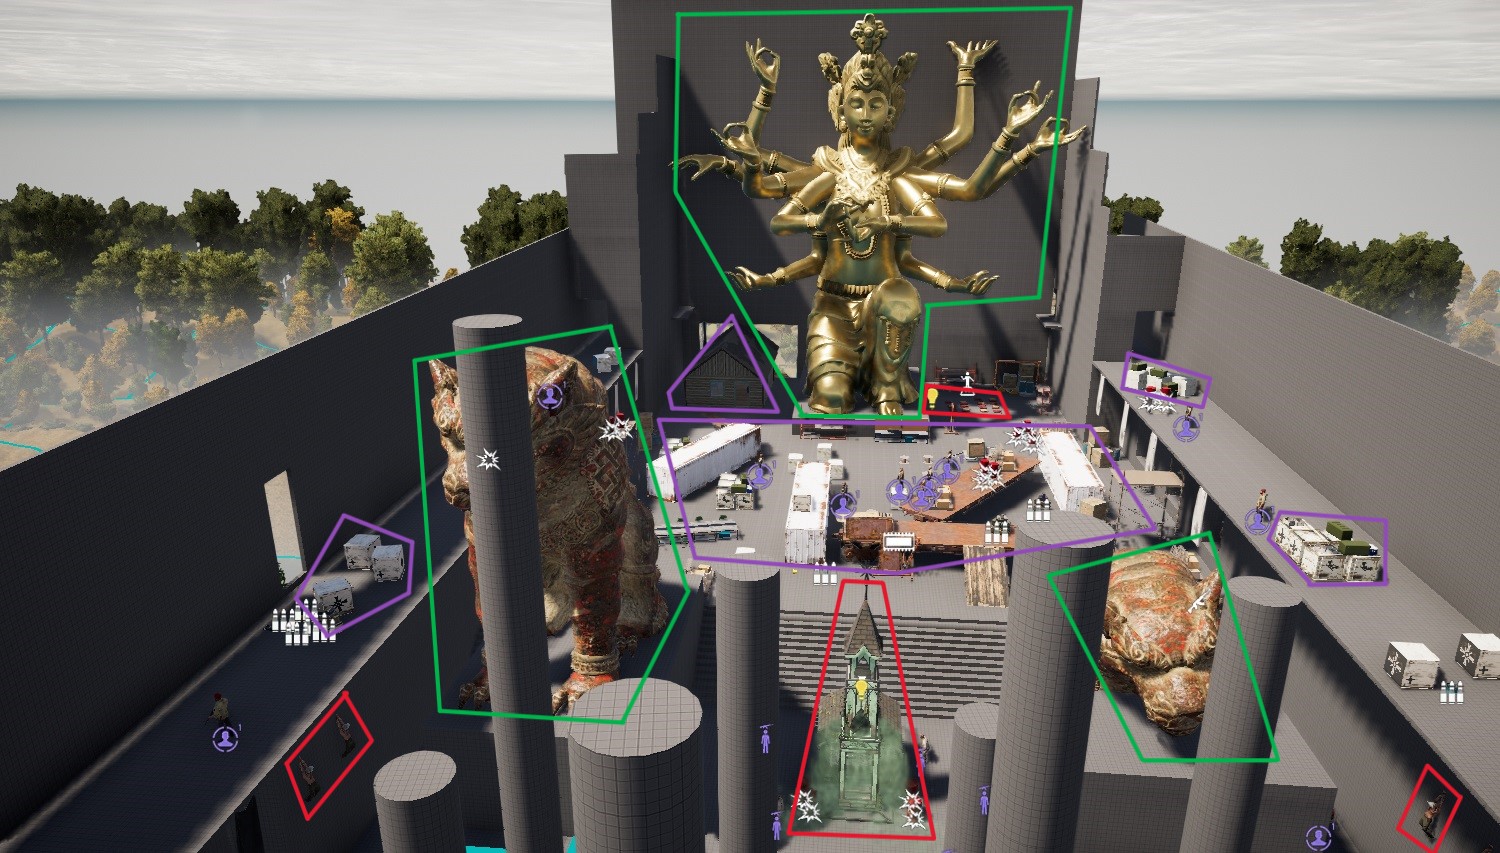
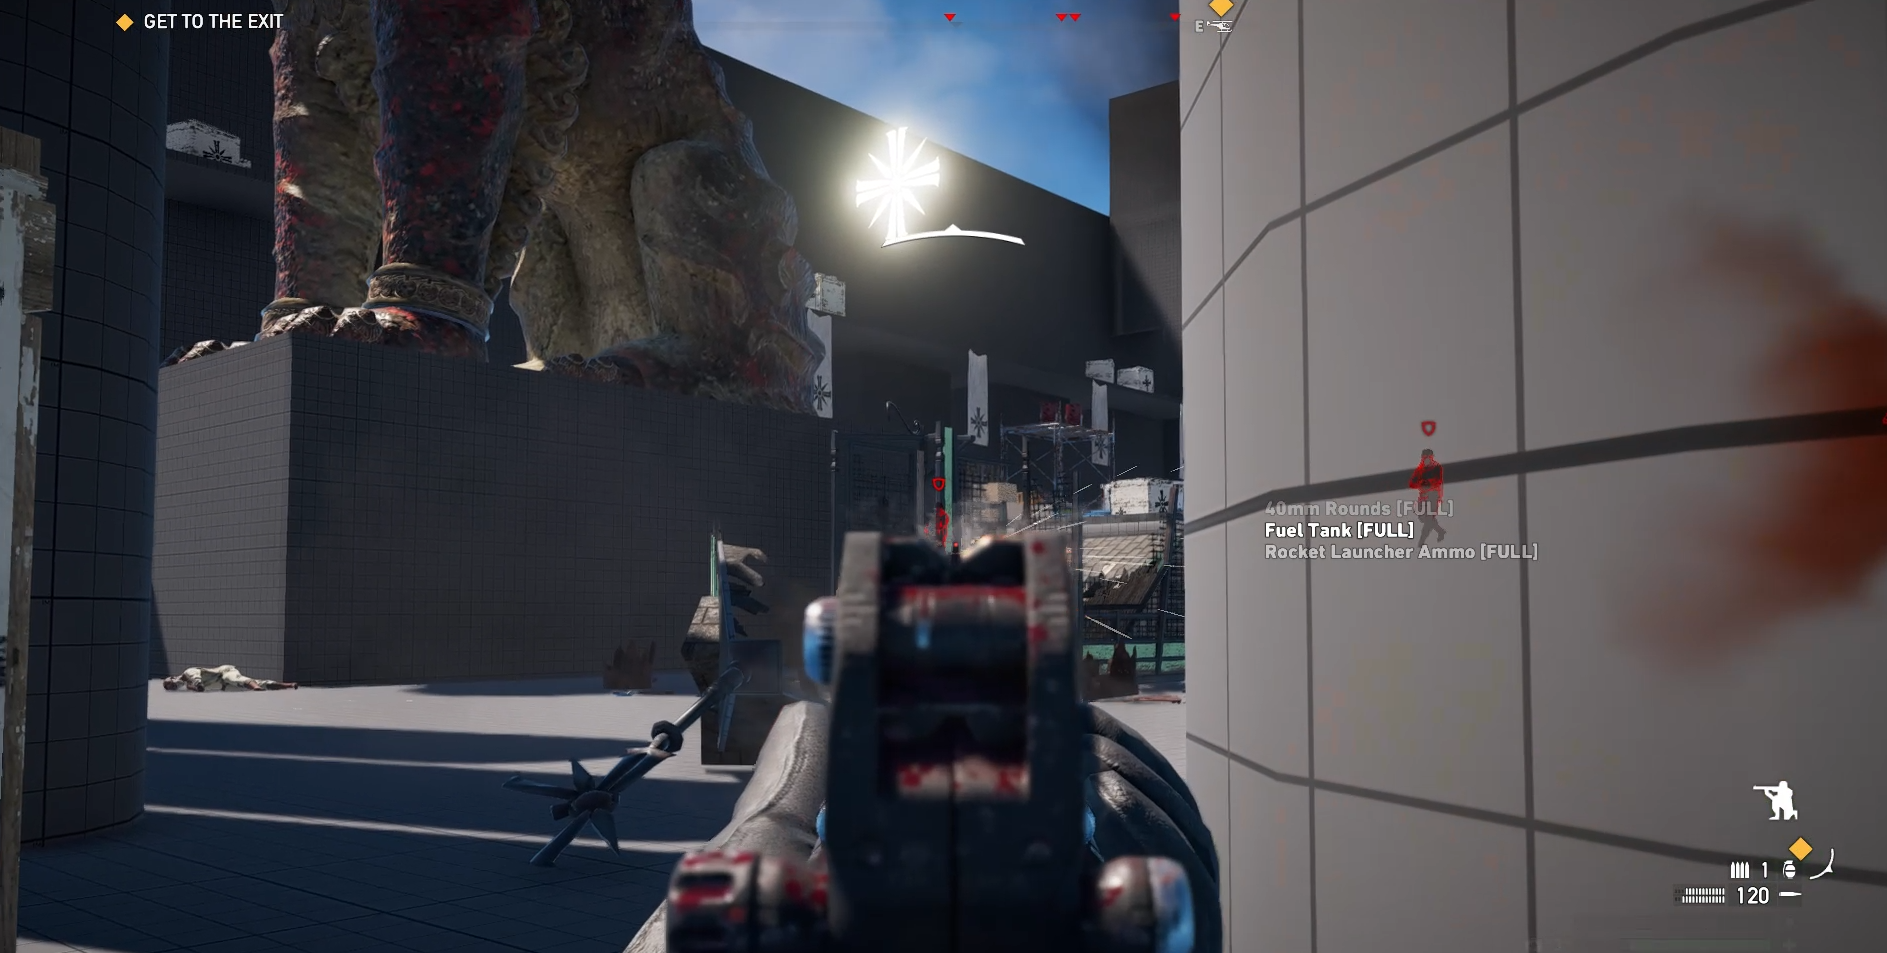
Inside the temple’s further chamber, the player faces the cartel leader in a large-scale boss encounter. The fight combines aggressive enemy reinforcements with vertical combat opportunities around the central statue.
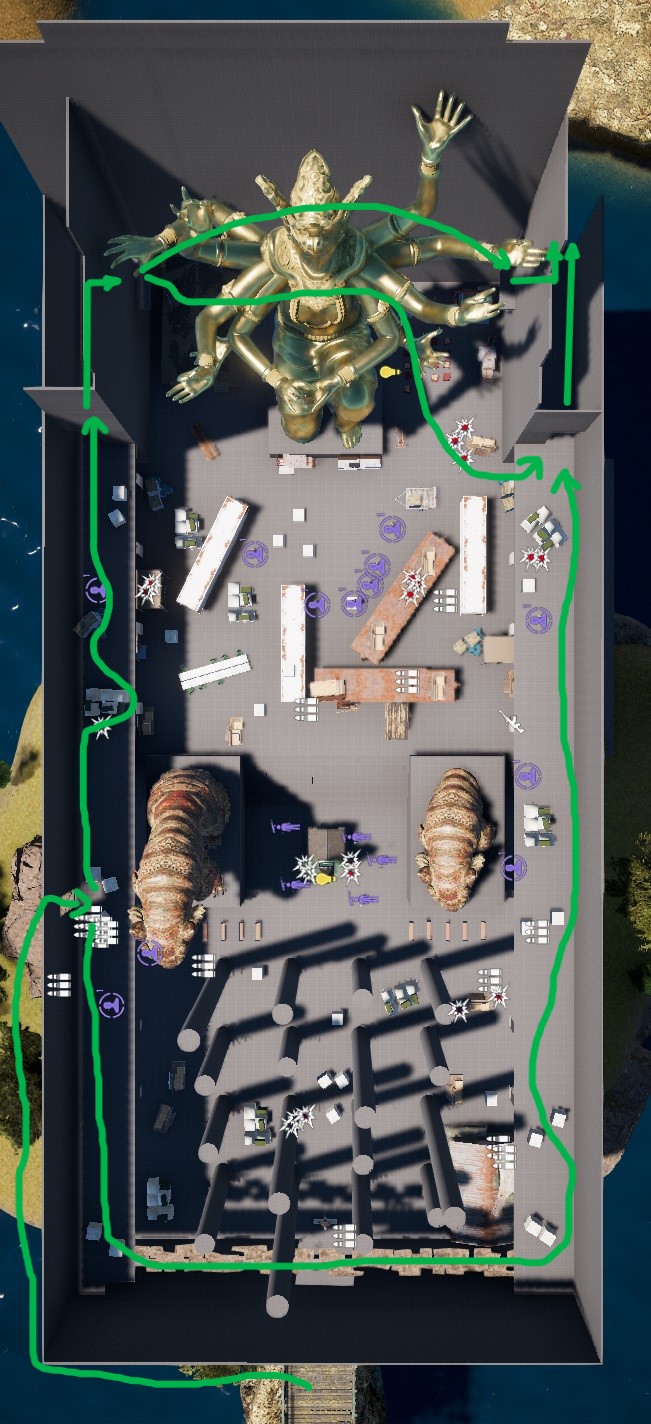
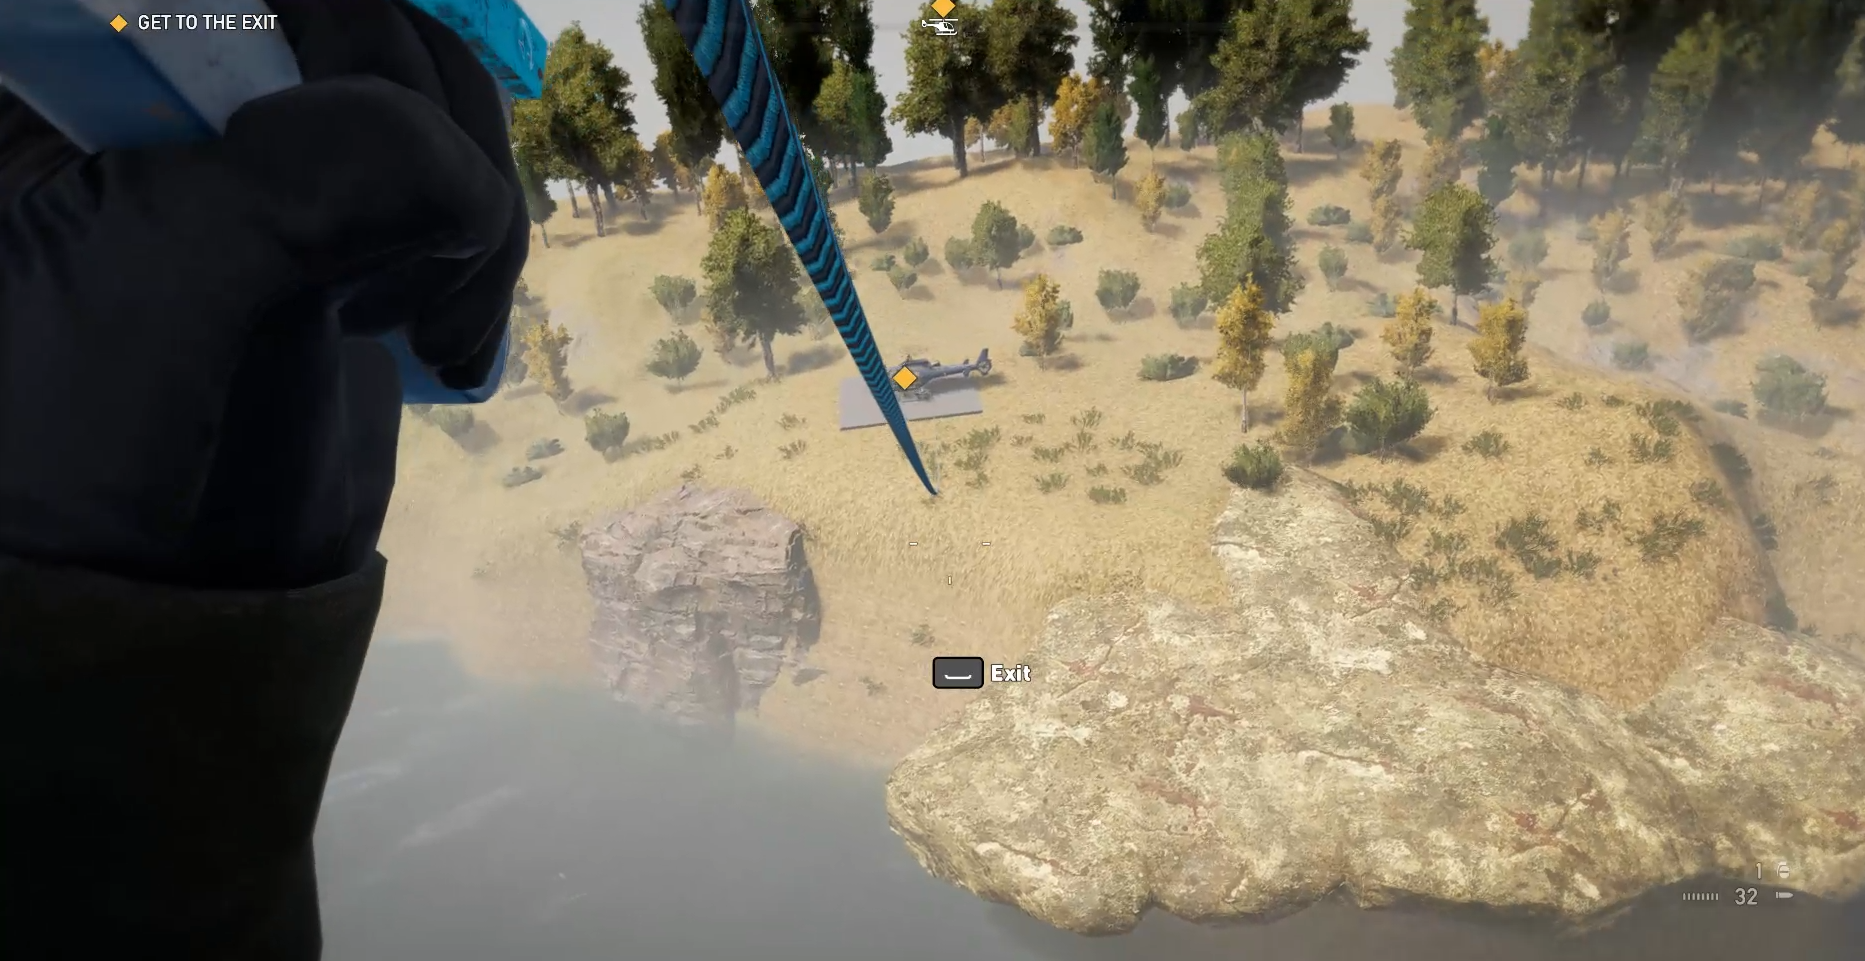
Beat 6: Escape
With the boss defeated, the player secures the helicopter for extraction.
Design Breakdown
Assault route
Results: The assault route emphasizes forward, combat-driven progression with clear cover flow. Cover is dense near entry points to support early engagements, then gradually opens up to promote movement and adaptive positioning. In the main building, cover shifts from front-facing layouts to concentric formations around the boss arena, guiding the player naturally toward the final encounter.
Goal: Create a route that feels aggressive and empowering, allowing the player to push forward through intense combat scenarios while maintaining tactical options for repositioning. Adding layers of complexity with the cover layout, enemy placement, and environmental hazards to ensure risk and opportunity constantly shift.
Execution:
Cover placement (green): Concentrated at entry zones to help players establish a foothold. As the route progresses, cover positions become more open and varied to support forward momentum and flexible combat strategies.
Enemy distribution (red): Hostiles are not static, they patrol or reposition dynamically reacting to the player, maintaining pressure and unpredictability.
Vertical complexity: In the main building, elevated side corridors introduce a second layer of tactical depth, hosting sniper enemies. These areas, once cleared, can also be used by the player.
Chaos elements (purple): Environmental hazards (explosive barrels, ammunition crates, and heavy machine gun nests) add to the challenge. Strategically placed within or near enemy formations. They offer high risk-reward if the player captures or detonates them at the right moment.
Stealth route
Results: The stealth route was designed to prioritize observation, timing, and silent progression. The layout provides ample hiding spots and vantage points for studying enemy patrols before committing to action. Key viewing positions offer temporary visibility of enemy routes, encouraging players to step briefly out of cover to plan their next move. The main path and an optional secondary path in the main building give flexibility without breaking stealth pacing.
Goal: Create a stealth experience that rewards patience and spatial awareness, allowing players to reach the extraction point with minimal confrontation. The design aims to maintain tension through proximity and visibility rather than direct combat.
Execution:
- Cover (green): Distributed throughout both buildings to provide safe spaces for players to observe patrols and plan movement. Some covers are aligned with enemy routes to increase tension and timing precision.
- Golden path (red) & alternate route (orange): The entry building can be cleared without eliminating any enemies if the player times movements correctly. The connecting bridge introduces a mandatory takedown, a single guard blocking the path. In the main building, the stealth route requires neutralizing one or two guards, depending on patrol timing.
- Visibility zones (yellow): These slightly exposed areas are designed for momentary observation, giving players a brief, high-risk opportunity to read the environment and anticipate enemy behavior.
- Flow & pacing: The route supports smooth, continuous stealth movement with clear sightlines and sound cues, ensuring the player feels control and pressure in equal measure.
Enemy roles & behaviour
Results: Enemy placement and patrol logic were designed to create layered combat encounters and maintain tension across both the assault and stealth routes.
Goal: Build a diverse enemy ecosystem that supports multiple playstyles.
Execution:
Entry Group: Melee, guards, and a lieutenant introduce combat flow; semi-dynamic patrols defend the entry area.
Bridge Guard: Creates a stealth tension point; minor threat alone, but supported by nearby heavies.
Wandering Heavies: Armored guards and flamethrower units patrol inside and outside the main building, adding unpredictability.
Snipers: Stationed on the elevated corridors of the main building.
Mindless Cultists: Melee enemies blocking the direct route to the boss; trigger cinematic chaos when barrels explode.
Boss & Heavies: Final combat peak, the cartel leader supported by heavies.
Environmental storytelling & Set piece
Results: The environment reinforces the contrast between sacred heritage and modern corruption. The ancient temple, once a place of worship, has been repurposed by a cartel into a drug production site, visually blending spirituality, decay, and industrial exploitation.
The bridge set piece introduces a controlled spike of tension, giving the player a moment of combat focus before entering the main building; a larger, more chaotic space.
Goal: Use environmental storytelling to convey narrative context and faction identity through composition and recognizable symbolic elements, guiding the player’s focus without the need for dialogue.
Execution:
Temple ruins (green): Remaining architectural elements of the Hindu temple emphasize abandonment and decay.
Cartel manufacturing (purple): Modern equipment and clutter show the cartel’s occupation and desecration.
Fanaticism (red): Ritual props, and ceremonial spaces reveal the cult’s religious obsession with faith and violence.
Bridge set piece: Designed as a transitional encounter, mixing combat with a cinematic vista of the golden statue ahead, pulling the player toward the next space .
Lessons learned
Highlight 1: Collision and visual consistency
Insight: Consistent collision feedback is crucial for player trust and fluid navigation. Small mismatches between visuals and geometry can disrupt immersion.
Issue: Some cover props (especially angled crates) appeared traversable but were blocked by oversized collision boxes.
Future Application: Refine collision volumes to more accurately match visible geometry, maintaining alignment between player expectation and actual interaction.
Highlight 2: Strengthening the opening section
Insight: A strong opening should establish pacing, tone, and basic player engagement before main encounters.
Issue: The initial area felt disconnected from the rest of the level, with limited opportunities for interaction or observation.
Future Application: Design early spaces as onboarding zones, lightweight in mechanics but rich in atmosphere and foreshadowing.
Highlight 3: Balancing stealth and assault pacing
Insight: Both playstyles benefit from clear pacing arcs, tension spikes, brief releases, and moments of choice.
Issue: The stealth route had flatter tension, lacking mid-section spikes compared to the assault path.
Future Application: Introduce small, optional stealth challenges or patrol overlaps to sustain engagement and risk-reward balance.


